Get an awning, shutter or blind onto real position tracking, and calibration to pass.
Updated: October 2026
What a cover is
In Shelly’s vocabulary a cover is any two-way motor that opens and closes a physical barrier — awnings, roller shutters, exterior shutters, venetian blinds and curtain motors.
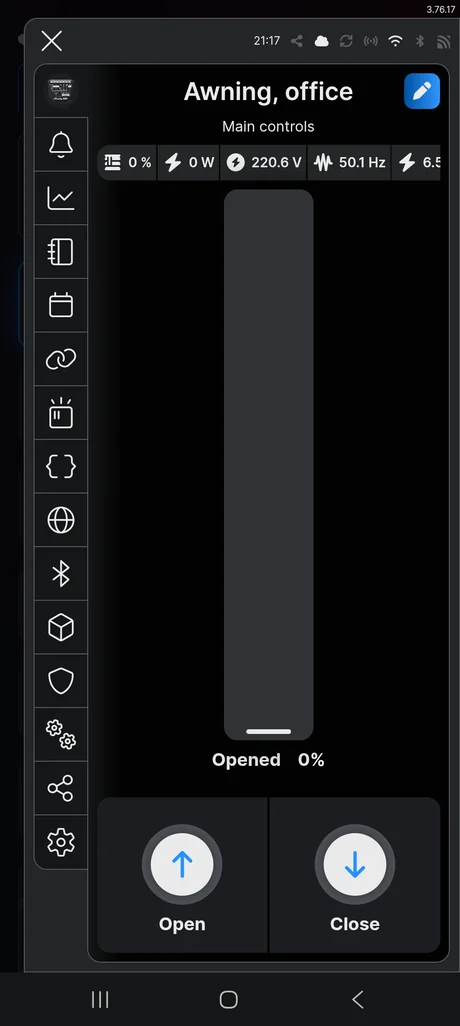
The cover profile gives you position tracking from 0 to 100 %, calibrated travel times, and firmware-enforced protection against driving both directions at once.
That last point is why the profile matters. Wiring two independent switches gives you the same two outputs and none of the safety: the cover profile enforces the interlock, exposes a position slider in the app, and stops when the motor reaches its end stops.
Choose your device
Three devices cover almost every installation. All three run 110–240 V AC.
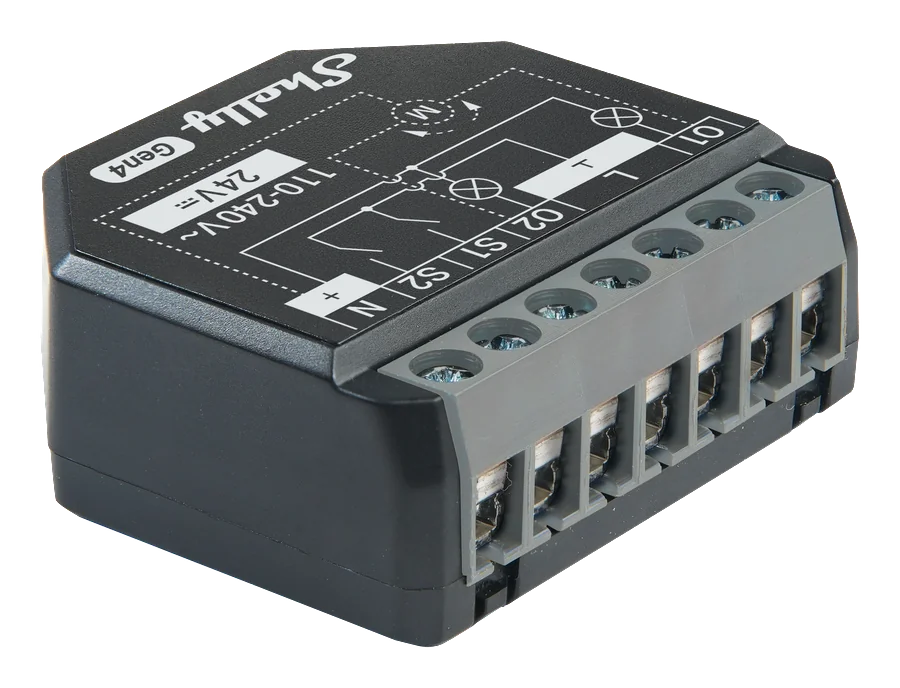
Shelly 2PM Gen4EAN 3800238070748
In-wall. One cover, behind the switch. Power metering on both channels. The example used in this guide.
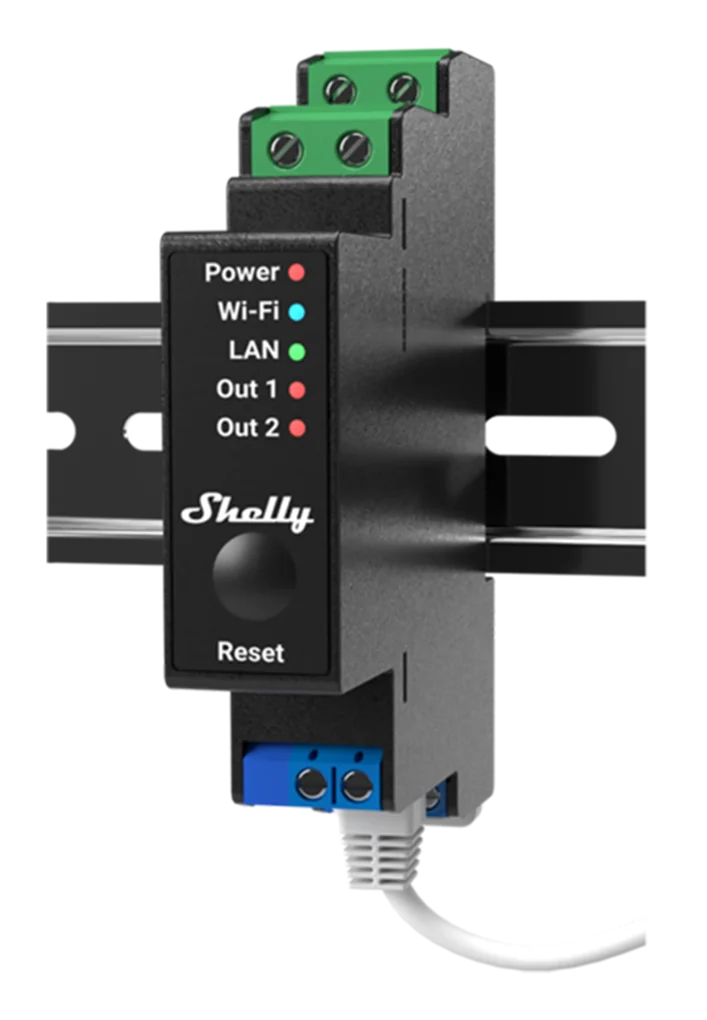
Shelly Pro 2PMEAN 3800235268032
DIN rail, 2 modules. One cover from the distribution board. Power metering.
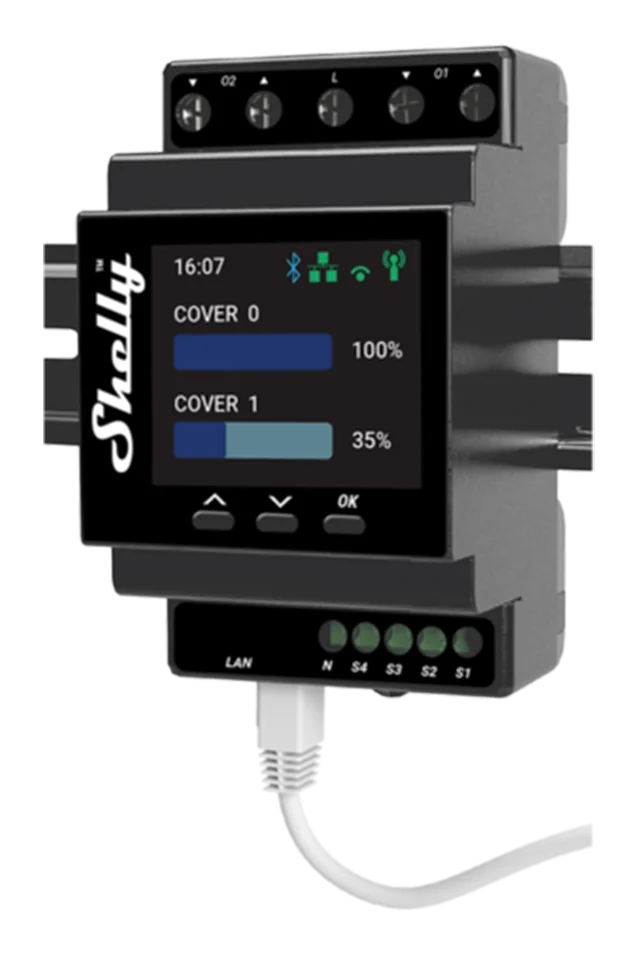
Shelly Pro Dual Cover PMEAN 3800235268124
DIN rail. Two independent covers from one device.
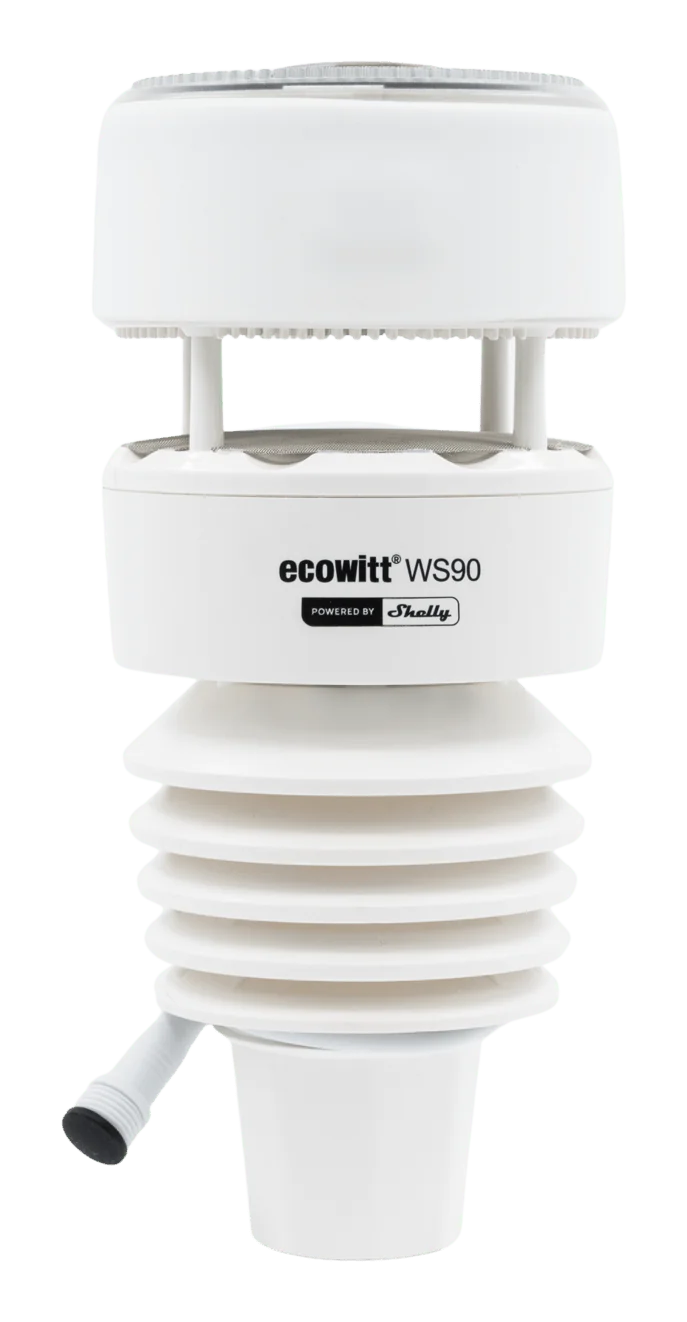
Optional additions: a Powered by Shelly Ecowitt weather station for local wind and rain measurement, and a Bluetooth remote – see below.
Installation
The steps use the 2PM Gen4 as the example. The principle is identical for the Pro 2PM and the Pro Dual Cover — only the form factor changes.
1
Wiring
Wire the device
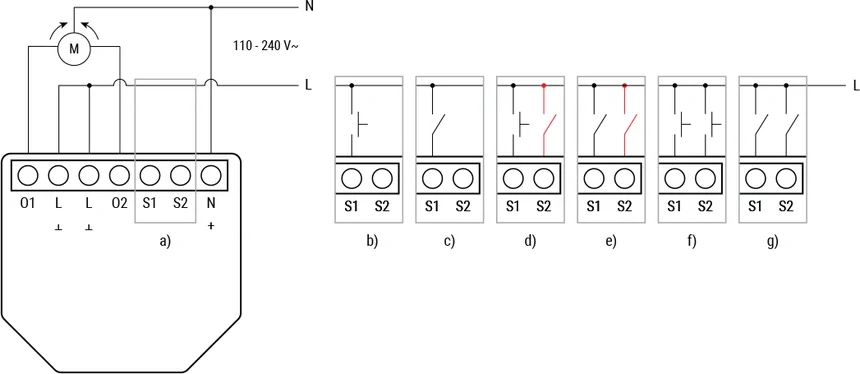
The motor’s two control wires — one per direction — connect to the relay’s two output channels. Supply connects to L and N as usual.
Verify the motor is 230 V AC before you start. The nameplate is the only reliable source; a DC motor on a cover device will not work and cannot be made to.
One output per direction. The firmware prevents both being energised at once.
2
Network
Add the device and update firmware
Bring the device onto the network as described in add a device, then update the firmware before configuring anything else.
Calibration relies on current motor behaviour profiles, and cover features are added regularly. See update device firmware.
3
App setting
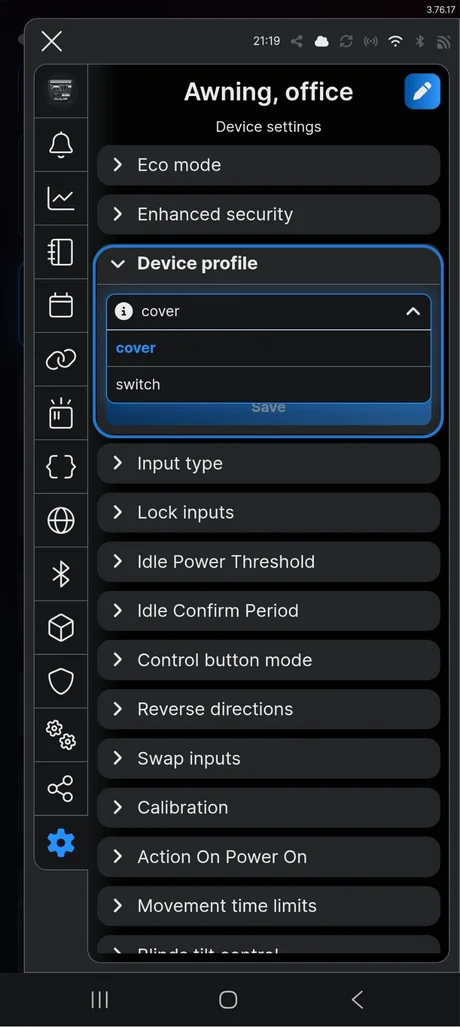
Set the device profile to cover
A two-output device ships configured as two switches. Change it:
Device settings → Device profile → cover → Save
The device reboots with the cover-specific settings available. Until you do this, none of the calibration or position settings exist.
Switch is the default. Nothing below works until this is changed.
4
Calibration
Run calibration
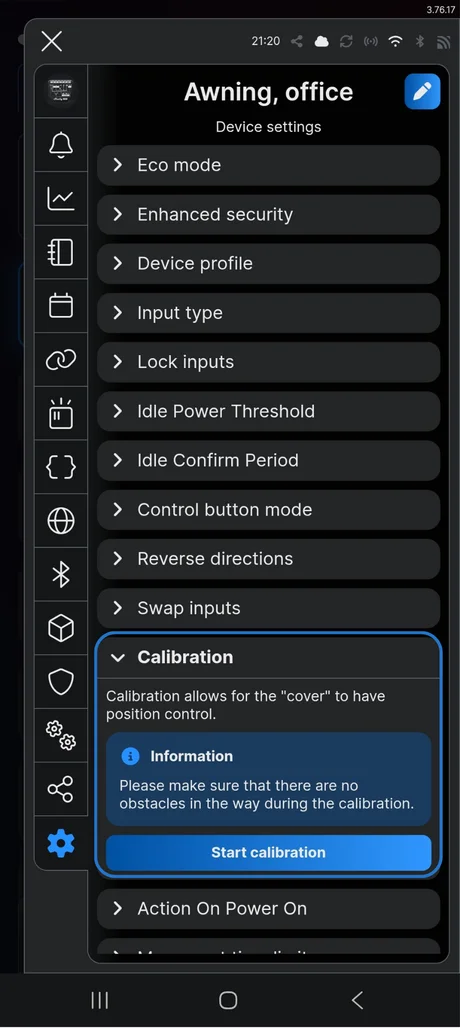
Calibration teaches the device how long a full travel takes and how much power the motor draws while running. Without it there is no position tracking at all.
Clear the cover’s path, then Device settings → Calibration → Start calibration. The cover runs a full open–close–open cycle by itself.
One full cycle, unattended. Keep the path clear.
5
Test
Test and verify
Tap Open — the cover should extend fully. Tap Close — it should retract fully. Then use the slider to send it to 50 % and confirm it stops where it should.
If Open closes the cover and Close opens it, enable Reverse directions in device settings rather than rewiring.
When calibration fails
Two settings account for almost every failure, and they fail in ways that look like a broken motor.
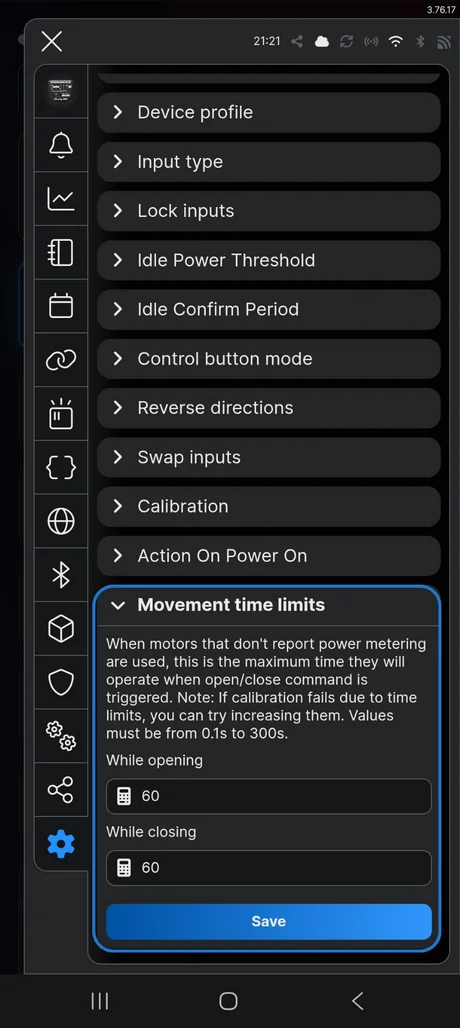
Movement time limits
The maximum the motor may run in one direction. Exceed it and the device stops the motor — and calibration fails.
The default is 60 seconds. A large awning may need 120–180. Set While opening and While closing higher than the motor actually needs for a full travel.
The default is too low for large awnings.
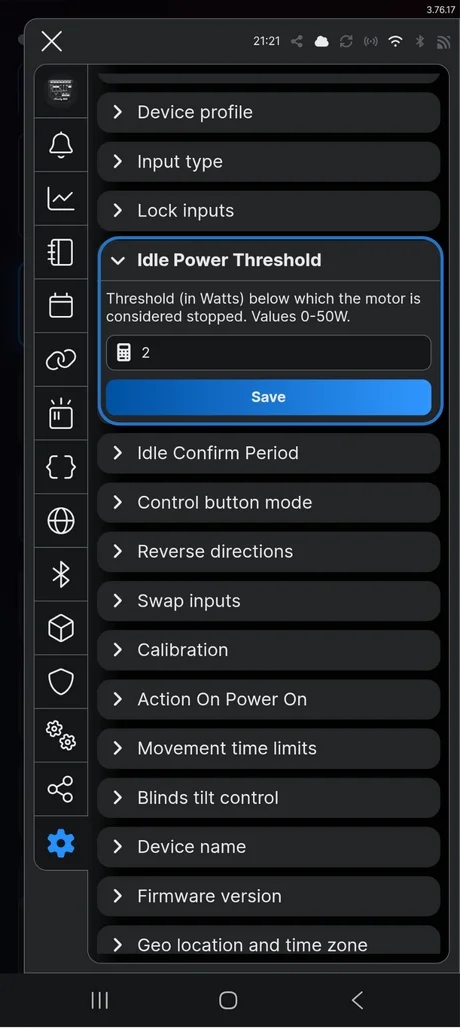
Idle power threshold
The power below which the motor counts as stopped. If the motor has a small standby draw, the device thinks it is still running — and calibration fails.
Read the actual standby draw in the device’s web interface with the motor stopped, then set the threshold 0.2–0.4 W above it. A motor drawing 1.2 W stopped wants a threshold of 1.4–1.6 W.
Set it just above the motor's real standby draw, not at zero.
Worth checking too
Input type if a physical wall switch is wired to the SW inputs, and control button mode, which decides whether the buttons behave as momentary or toggle depending on the switch fitted.
Weather automation
An awning left out in wind is the most expensive failure in this guide, and it is entirely preventable.
An Ecowitt weather station (WS90) measures wind and rain at the building itself. Build an automation that retracts the awning when conditions pass the motor manufacturer’s limits.
Ecowitt Weather StationEAN 3800238072032
Powered by Shelly. Measures wind and rain at the building.
Most awning motors handle 20–30 km/h. Check the motor’s spec sheet for the exact figure, and set the threshold 5–10 km/h below it, so the awning is already retracting when the gust arrives.
Local measurement matters here. A forecast describes the region; the gust that damages an awning happens at the building, and by the time a forecast reflects it the awning is already out.
Position control and weather automation in one tile.
Wireless remote controls
A Bluetooth battery remote pairs directly with the cover device. No Wi-Fi, no app and no cloud for everyday use — which also means it keeps working when the network does not.
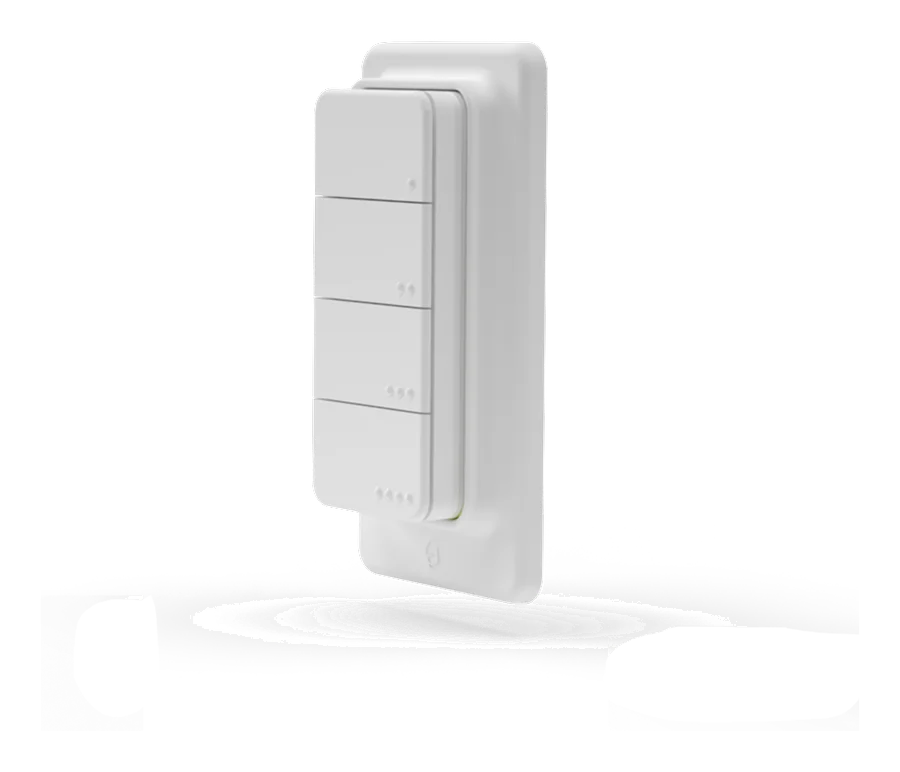
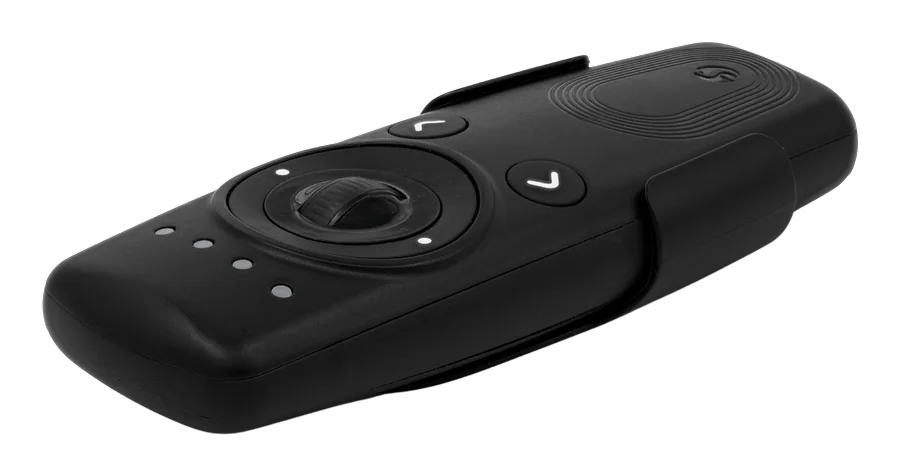
Shelly BLU RC Button 4 ZB is a compact four-button remote with a magnetic backplate. Mount it by the terrace door, or take it with you.
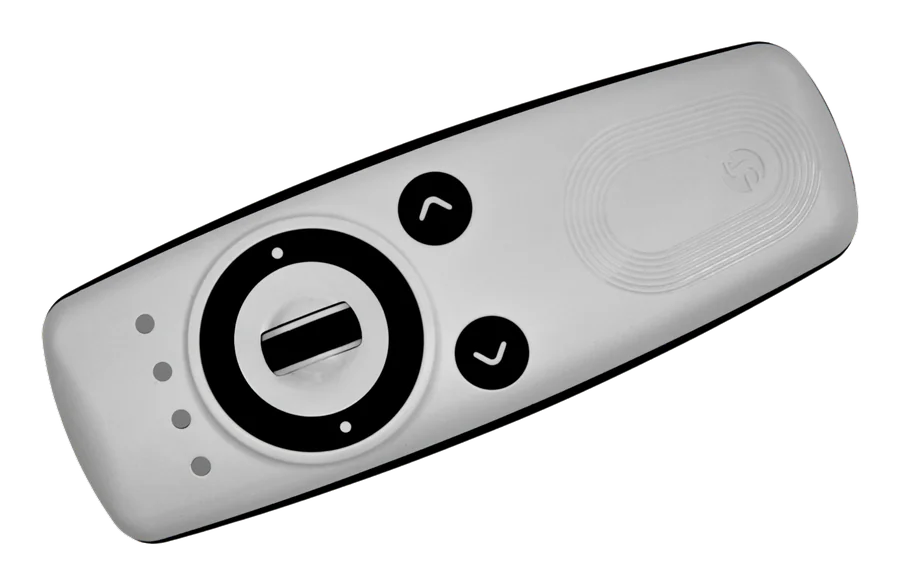
Shelly BLU Remote Control ZB is the traditional shape: larger buttons, longer battery life, and it feels like a TV remote. The better choice for a living room, and for customers who dislike small controls.
Shelly BLU RC Button 4 ZB WhiteEAN 3800238072537
Four buttons, magnetic backplate.
Shelly BLU Remote Control ZB WhiteEAN 3800238072162
Larger buttons, longer battery life.
Shelly BLU Remote Control ZB BlackEAN 3800238072179
The same remote in black.
Pairing follows the same Bluetooth procedure as the BLU Wall Switch.
Tips & best practices
Check the nameplate before you quote. A DC motor means a different device and a different price, and finding out on site is the wrong time.
Recalibrate after mechanical work, and periodically. New end stops or a serviced motor change the travel time, and motors slow slightly as they age — position tracking drifts with them.
Set the movement limit generously. The cutoff is a backstop, not the normal stop trigger.
Wind protection is not optional on an awning. Where there is no weather station, at least set a schedule that retracts it overnight.
Pair more than one remote. Several BLU remotes can share one cover device, so each family member can have their own.
Add a door sensor. A BLU Door/Window on the terrace door can retract the awning when everyone goes inside.
Video tutorial
The full installation, from wiring to calibration.