1
Setup
Create the scene
Go to Home, open All Scenes and tap the + button.
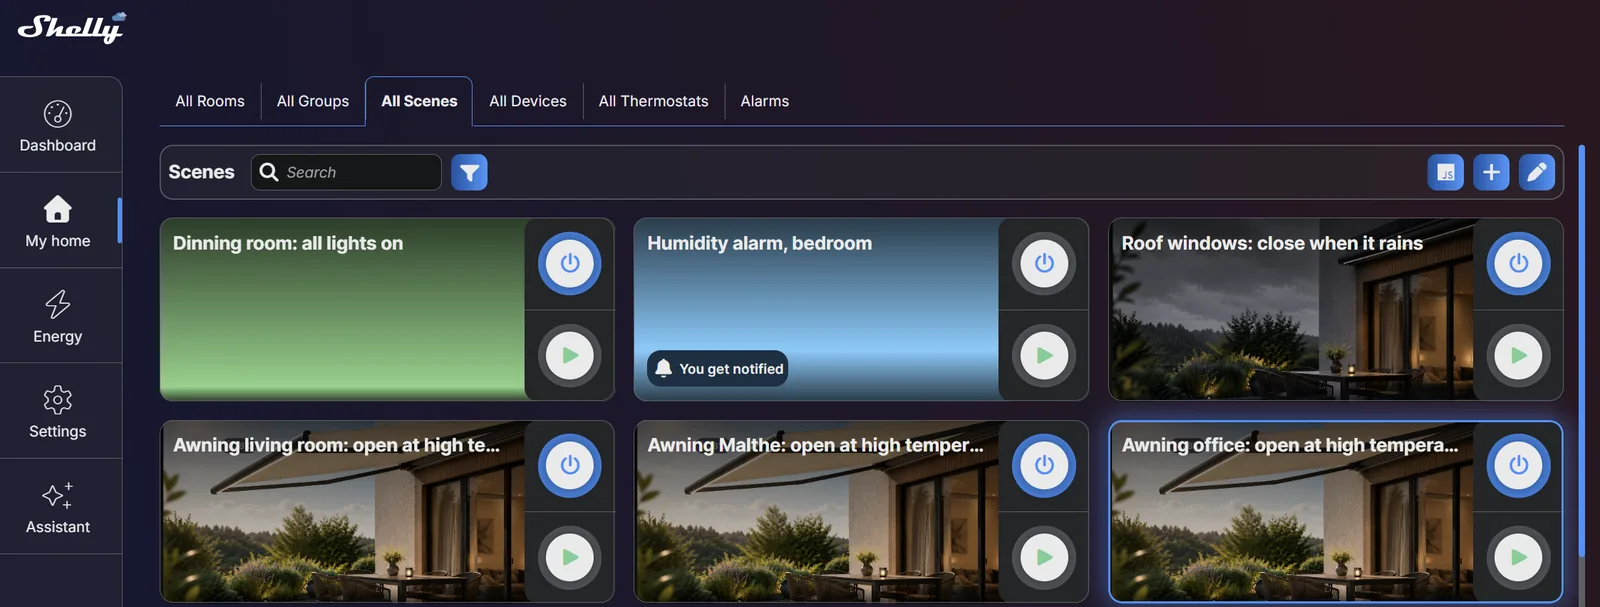
A scene runs in the Shelly cloud, so it needs an internet connection to fire. Anything that has to keep working during an outage belongs in a schedule or an action instead — both run on the device itself.
Eight steps in Shelly Smart Control, or at control.shelly.cloud. The app walks the tabs in order.
Further down the page there are five video walkthroughs, each building a real scene from start to finish.
Go to Home, open All Scenes and tap the + button.
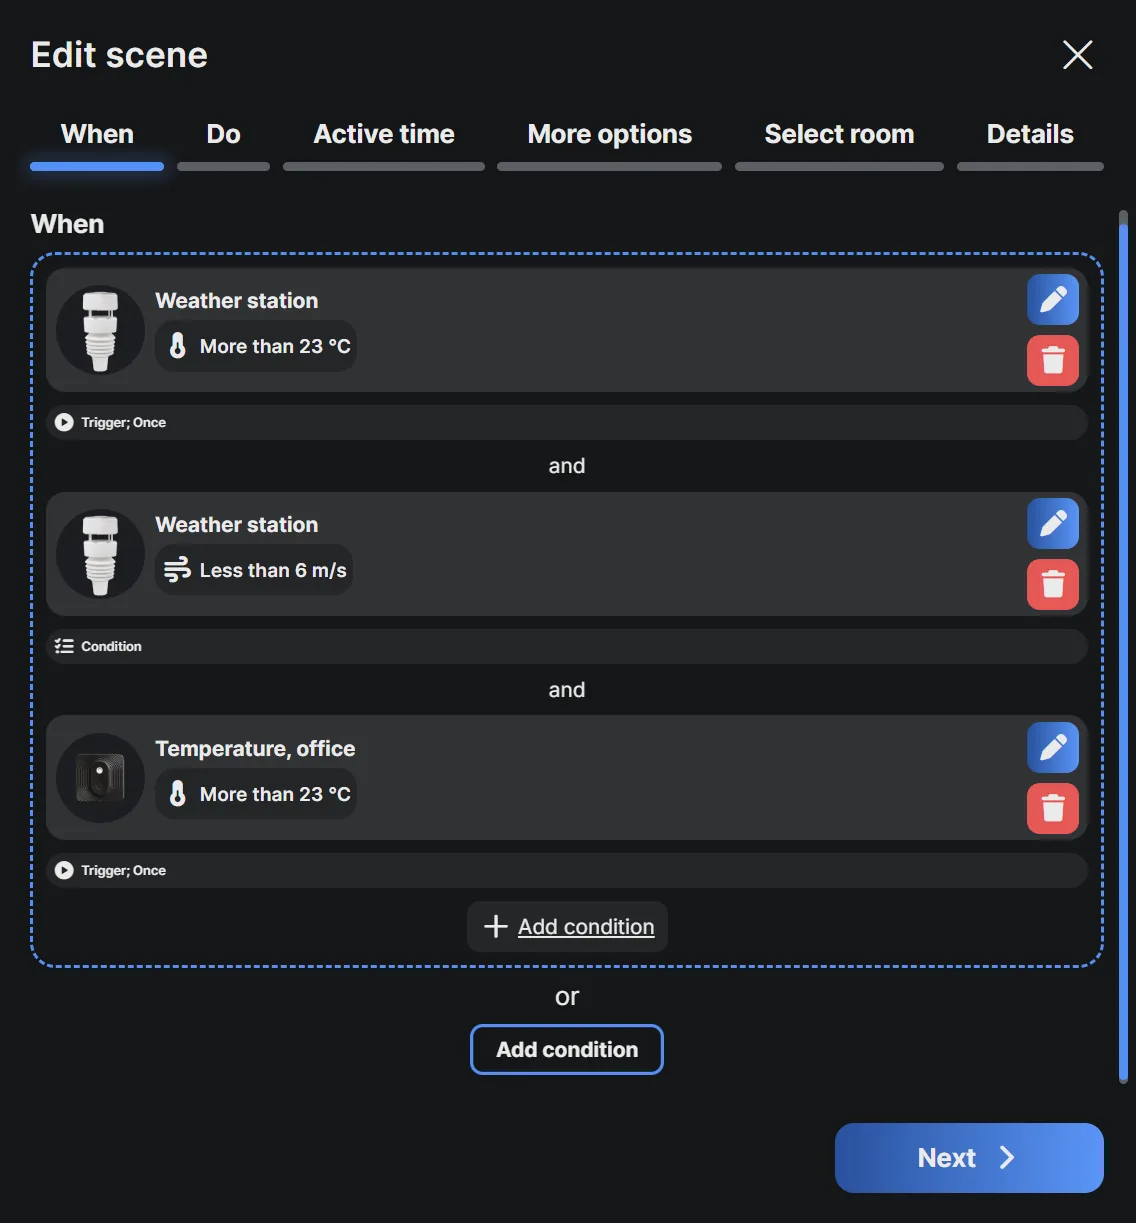
What starts the scene: a device action, a time, an alarm zone, a weather forecast, or sunrise and sunset. Weather and sun triggers need a premium plan.
Several conditions can be combined with and and or. Each one also carries a condition type that decides how often it fires — see condition types, and set it deliberately.
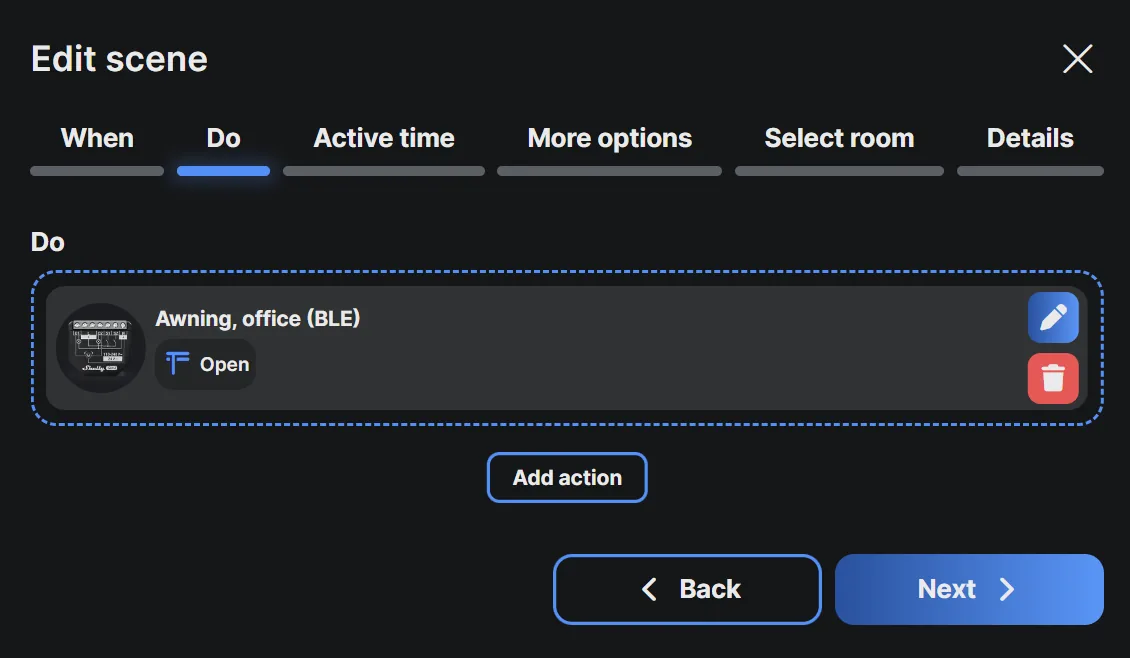
What happens: one or more devices, a group, a notification, or arming and disarming an alarm.
Add as many as the scene needs. A scene that switches two relays and sends a notification is three actions in one scene, not three scenes.
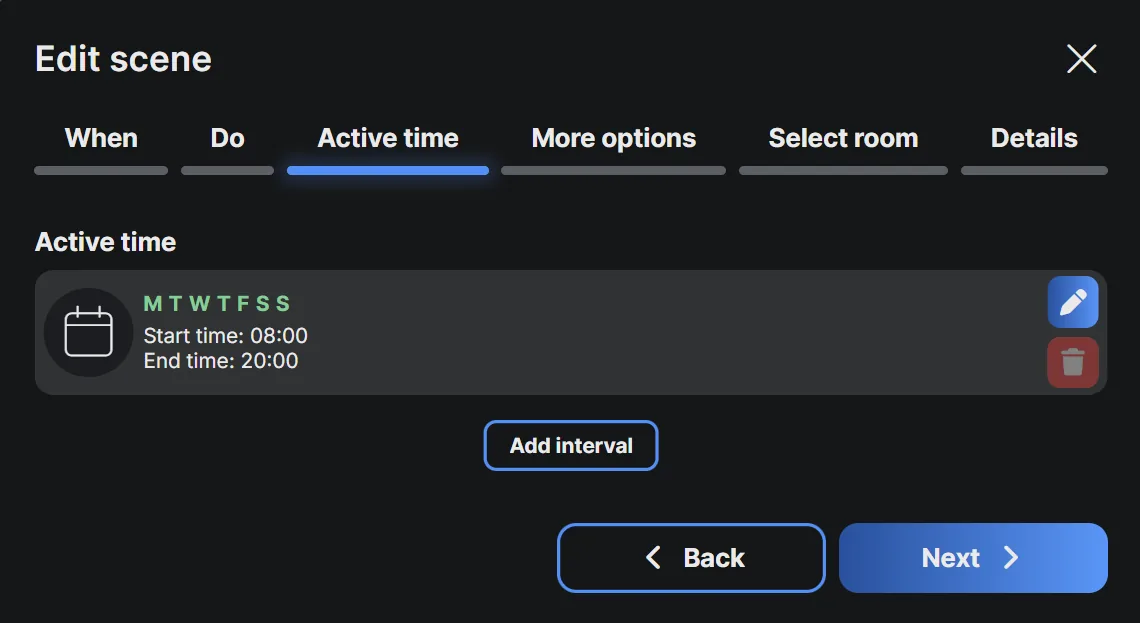
The period the scene is allowed to run at all. It is unrestricted until you change it.
This is what turns a blunt automation into a usable one: a motion-triggered light that only runs after sunset is far less annoying than one that runs at noon.
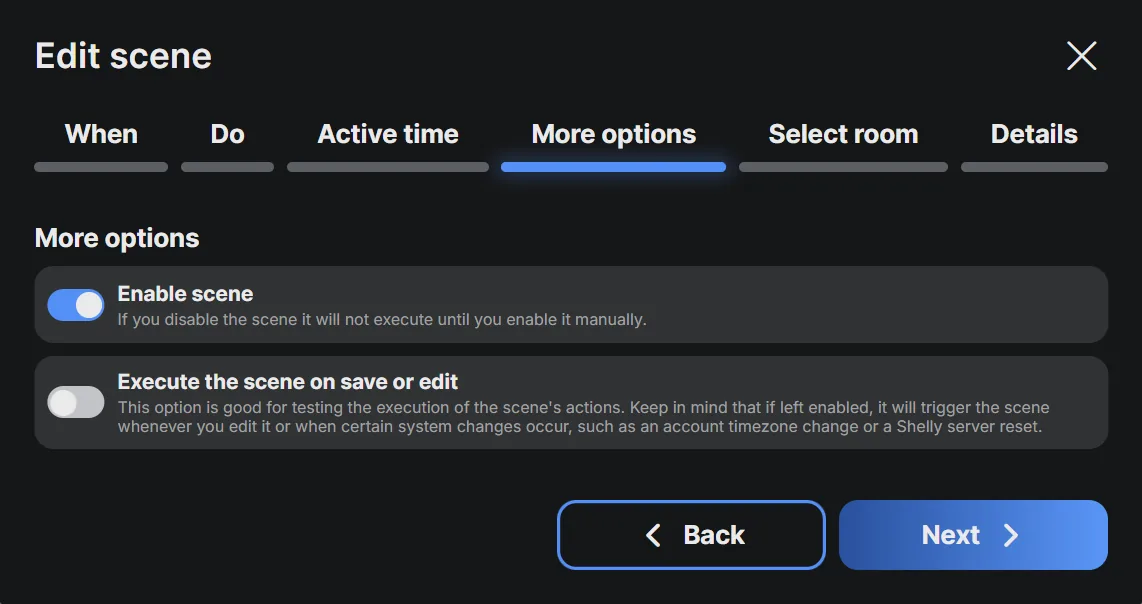
Enable scene has to stay on. A disabled scene keeps its whole setup and never fires.
Leave Execute the scene on save or edit off. It runs the Do actions without checking the When condition, so it proves nothing about the trigger — and it fires again every time you edit the scene.
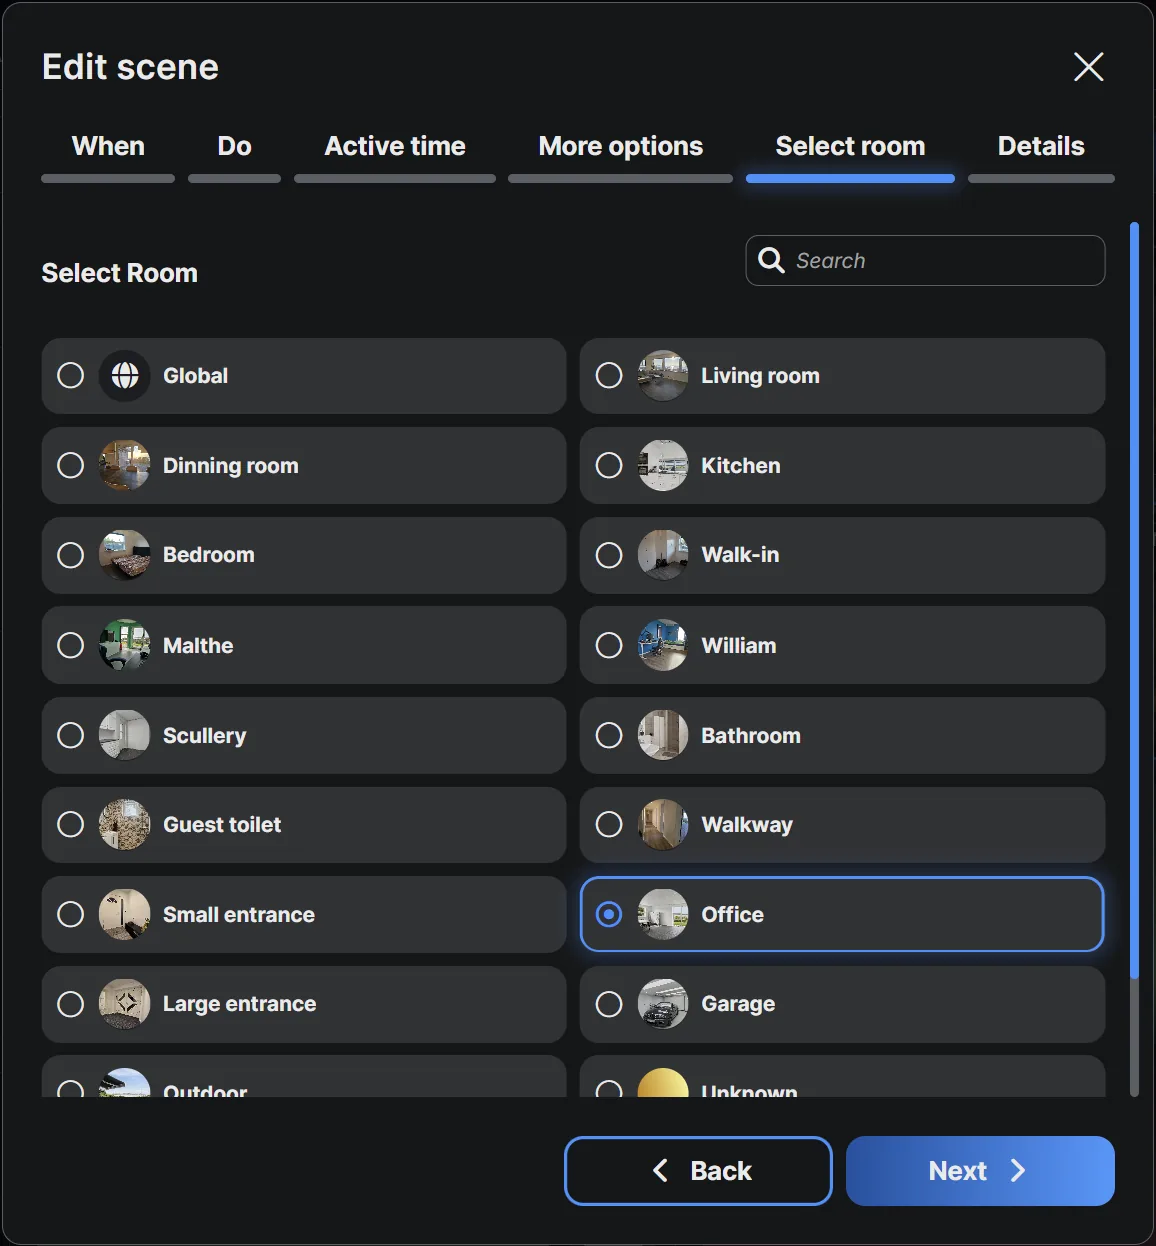
Where the scene is filed. This is not decoration — it is how the scene is found again in a house with thirty of them. Use Global for anything that spans rooms, like an all-off.
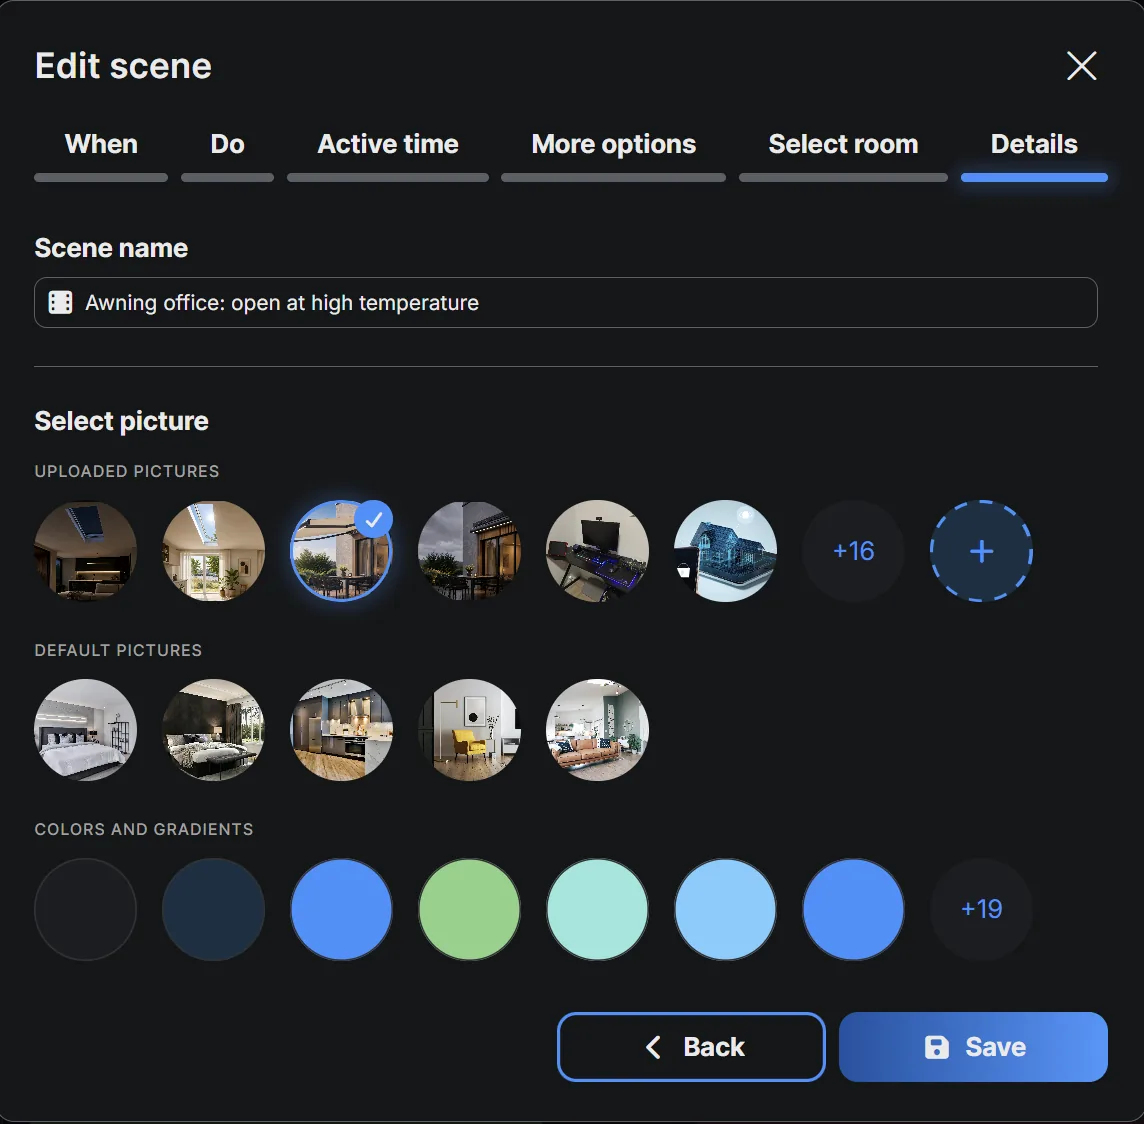
Name the scene after what it does, and include the room. Then give it a picture or a colour — your own image, a stock one, or a flat colour.
Green for something that switches on and red for something that switches off is a habit worth keeping. It reads faster than any name.
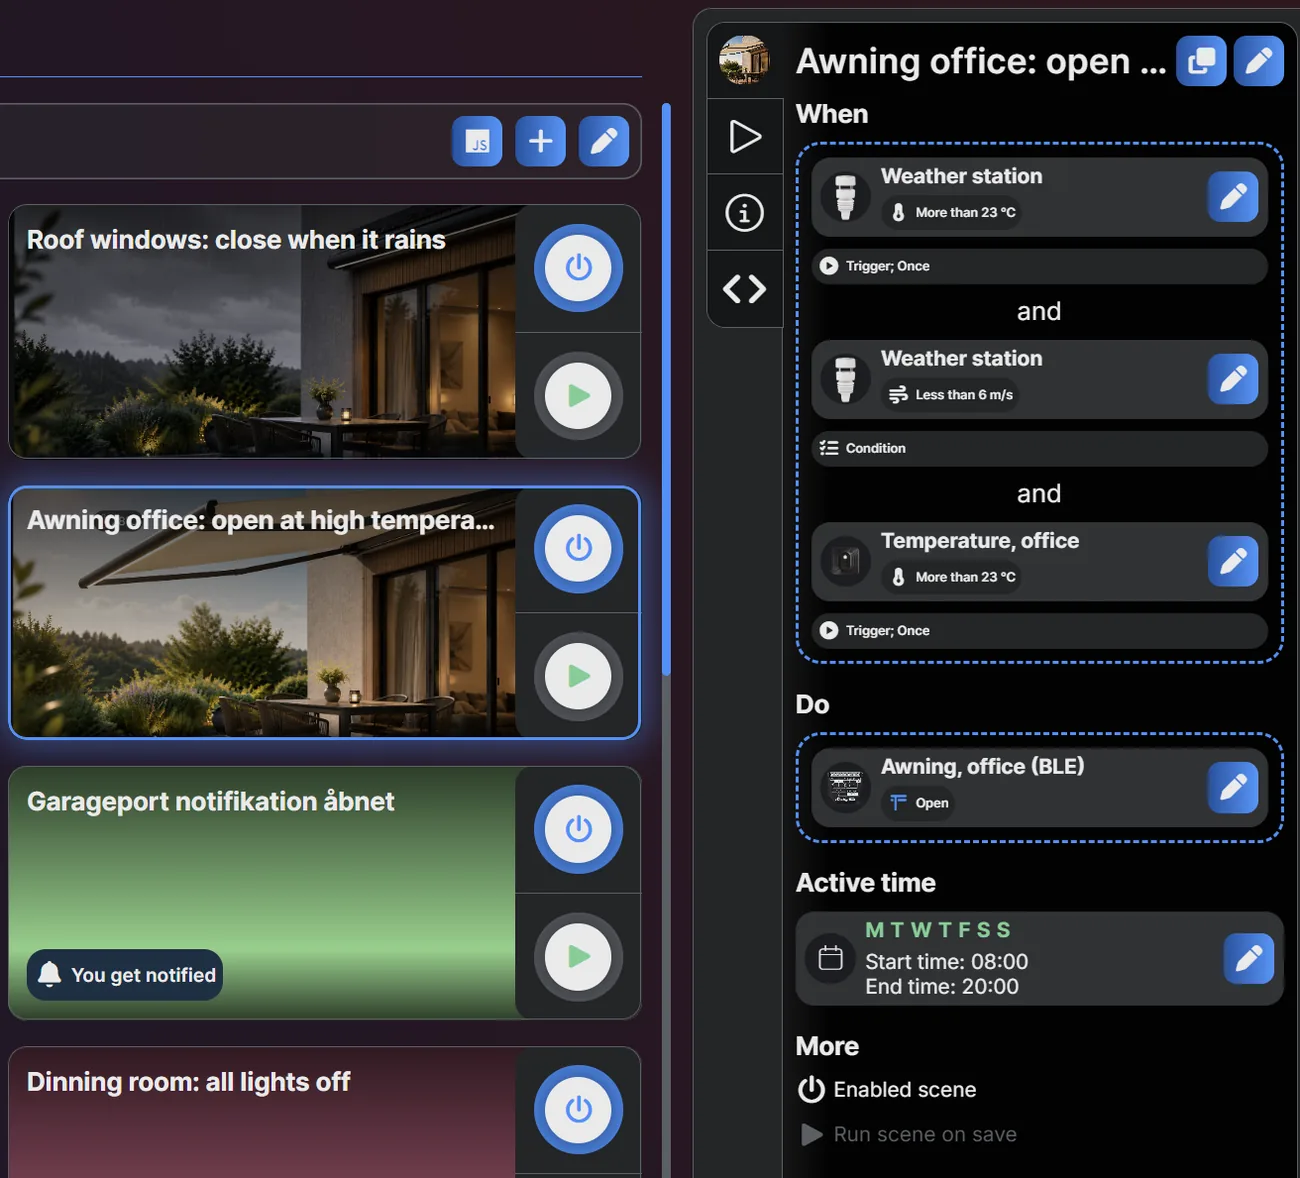
A blue ring around the power symbol means the scene is enabled. A scene can be paused this way without being deleted, which is useful for anything seasonal.
Tap the scene picture for a summary of its When, Do and active time. Then trigger the condition for real. Running the scene by hand proves the actions work; it proves nothing about the condition, and the condition is where the fault usually is.
Every trigger carries a condition type, and it decides how often the scene fires. Getting it wrong is the most common reason a scene works sometimes.
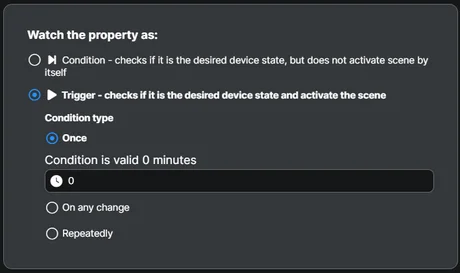
The scene runs one time when the condition is met. It will not run again until the condition stops being true and becomes true again.
A light-level trigger set to below 50 lux fires as the level crosses downward. For it to fire again, the level has to rise above 50 and fall below once more.
The condition is valid field adds a delay: set it to two minutes and the scene waits until the state has held that long before acting. This is what stops a door sensor notifying you about a door that was open for four seconds.
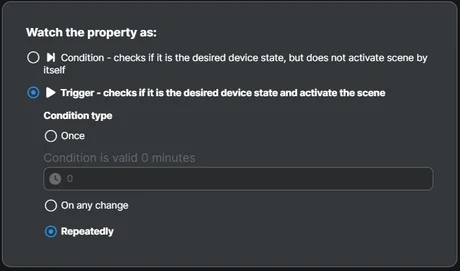
The condition is checked every full minute, and the actions run again every minute for as long as it stays true.
Useful for something that has to be maintained rather than switched — and a poor choice for notifications, which is how people end up with sixty push messages about a warm freezer.
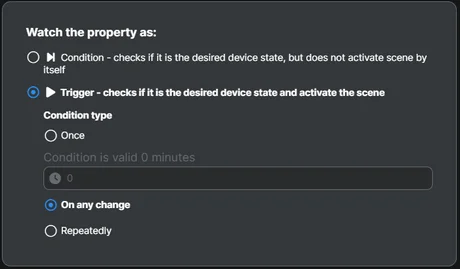
The scene fires on every new value that still meets the condition, even if the previous run has not finished.
The difference from Once is clearest with a measurement. A temperature rises from 6 °C to 12 °C, and a trigger set above 10 °C fires on both types. The temperature then rises to 15 °C: Once stays quiet, because the condition never stopped being true. On any change fires again.
That makes it the right choice for monitoring temperature or power consumption, and the wrong one for anything that switches a load.
The pattern: Once for events, Repeatedly for states that must be maintained, On any change for measurements you are watching.
Five worked examples, from the simplest to the most specific.
The When and Do steps in the app, built from nothing.
Loads YouTube when you press play. Watch on YouTube
By ShellyGuide on YouTube
Worth watching even if you build it as an action instead — the scene version shows what the extra conditions buy you.
Loads YouTube when you press play. Watch on YouTube
By ShellyGuide on YouTube
The simplest useful scene there is, and the pattern behind most “these two should always match” requests.
Loads YouTube when you press play. Watch on YouTube
By ShellyGuide on YouTube
A Shelly input module and a Bluetooth battery button controlling other devices. This is the scene equivalent of the wiring covered in dimming with an input module — useful where the logic is more than on and off.
Loads YouTube when you press play. Watch on YouTube
By ShellyGuide on YouTube
Driving colour rather than brightness — setting a specific colour on an RGBW device as part of an automation. See LED strip control for the hardware side.
Loads YouTube when you press play. Watch on YouTube
By ShellyGuide on YouTube