- Home
- Installations
- LED strip control
Installations
LED strip control with Shelly
Dim an LED strip properly — and what to fit instead of a phase dimmer.
Updated: August 2026
The problem with phase dimming
The common approach to a dimmable LED strip is a Shelly dimmer — Gen3, Gen4 or Pro — driving a dimmable 12 V or 24 V LED driver. It works, and it is the wrong answer.
Phase dimming was designed for filament lamps. A dimmable driver takes that chopped mains waveform and translates it into a DC output, and the translation is where the quality is lost: the bottom of the range becomes unstable, drivers from different manufacturers behave differently on the same dimmer, and flicker appears exactly where the customer wants a low, warm setting.
Dim the strip, not the driver. A Shelly RGBW controller sits on the DC side and dims by PWM — switching the output on and off 833 times a second — so nothing has to interpret a chopped waveform on the way.
The right approach
Three parts, in this order:
- A non-dimmable 12 V or 24 V LED driver. It only has to deliver a steady voltage — which is what a driver is good at, and cheaper than a dimmable one.
- A Shelly RGBW controller on the DC side, between the driver and the strip.
- The strip, matched to the driver voltage.
It is usually cheaper too. A non-dimmable driver plus a controller often costs less than a dimmable driver plus a dimmer, and it gives you colour or tunable white as well.
Choose your device
| Plus RGBW PM | Pro RGBWW PM | |
|---|---|---|
| Mounting | In-wall, 42 × 37 × 12 mm | DIN rail, 1 module |
| Supply | 12/24 V DC | 12–24 V DC |
| Channels | 4 | 5 |
| Per channel | 4 A | 6 A |
| Device total | 10 A | 16 A |
| Profiles | 3 | 4 |
| Connectivity | Wi-Fi, Bluetooth | Wi-Fi, Bluetooth, Ethernet |
Worked example. A 24 V strip drawing 14.4 W per metre pulls 0.6 A per metre. A 10-metre run is 6 A — inside a Pro channel, over a Plus channel. Two 10-metre runs on a Pro is 12 A, still inside the 16 A total. Three is not.
Open the tool Device finder Both controllers, and the rest of the range, filtered by what the job needs.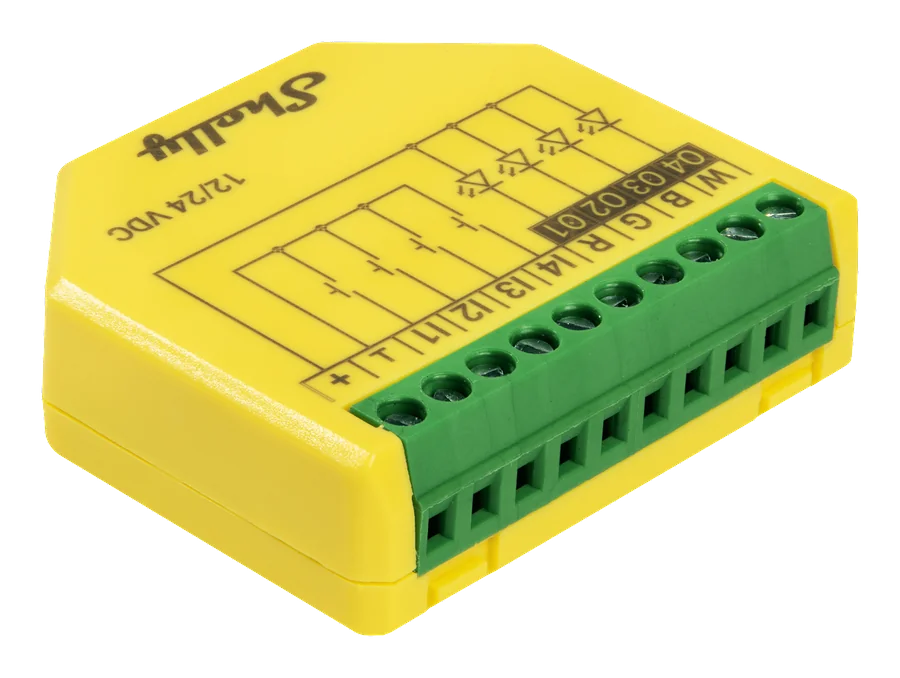
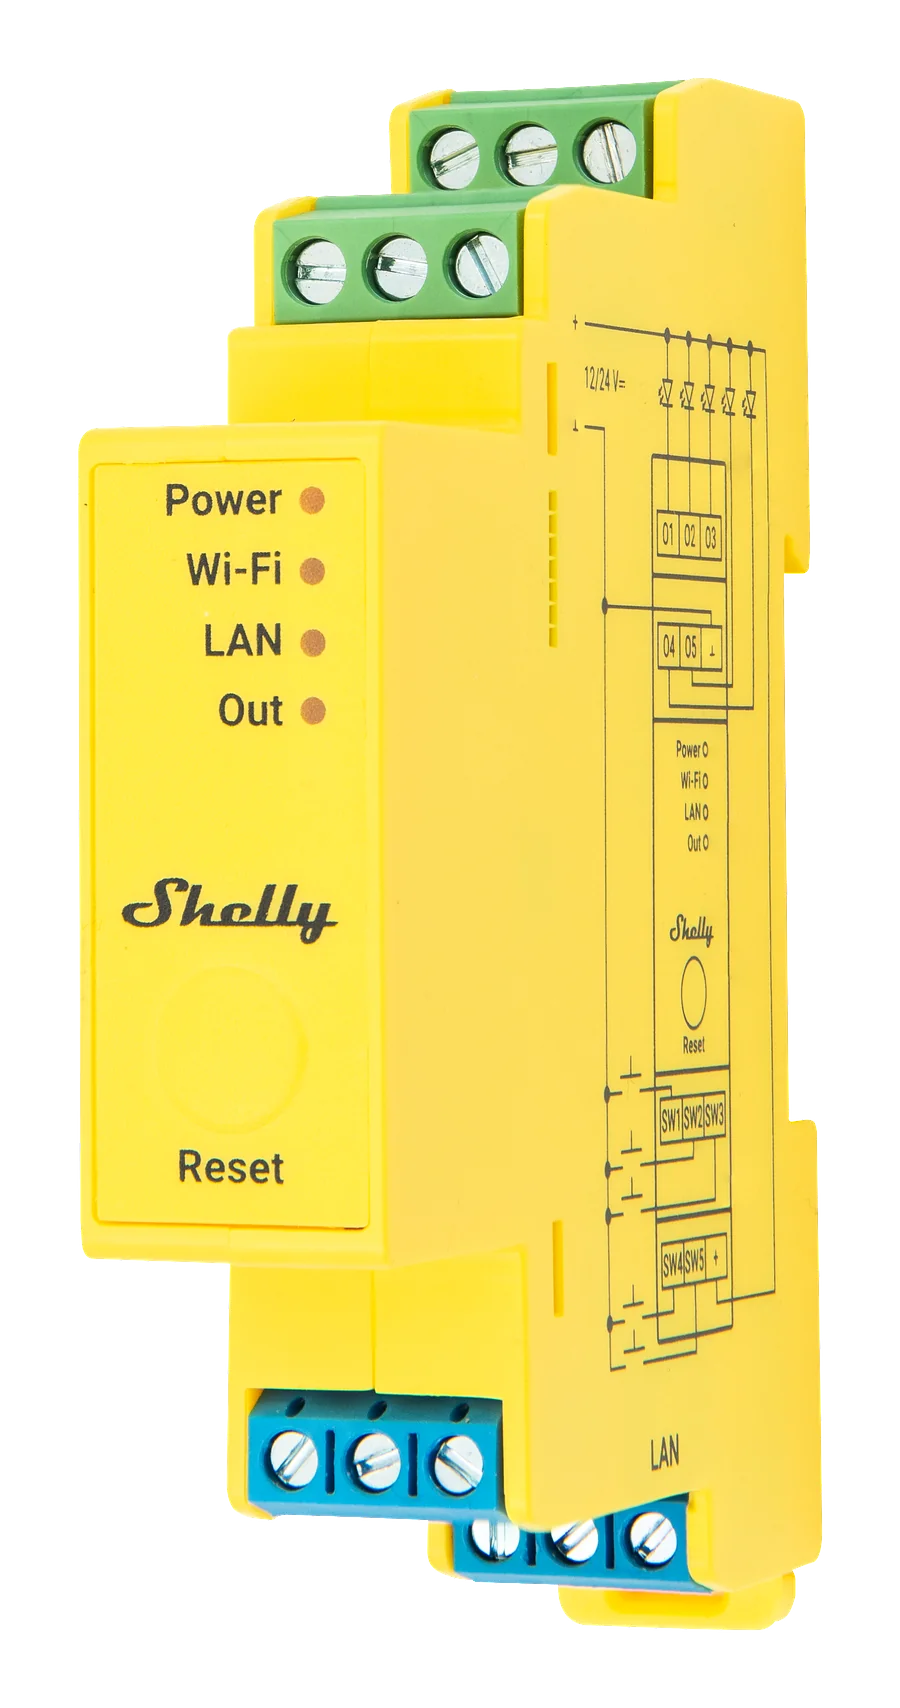
Device profiles
The profile tells the controller what is connected, and it decides what every output means. Set it before wiring.
Plus RGBW PM — three profiles
| Profile | Strip type | Outputs |
|---|---|---|
light |
Up to four separate single-colour strips | 4 independent, one input each |
rgb |
Colour strip, no white | 3 (R, G, B), one input controls all |
rgbw |
Colour strip with a white channel | 4 (R, G, B, W), one input controls all |
Pro RGBWW PM — four profiles
| Profile | App name | What it drives |
|---|---|---|
rgbcct |
RGB and CCT | Colour on O1–O3, tunable white on O4–O5. The default |
cctx2 |
CCT x 2 | Two independent tunable-white zones |
rgbx2light |
RGB and lights x 2 | Colour plus two separate single-colour strips |
light |
Lights x 5 | Five separate strips, controlled independently |
The light profile is the one people overlook. A controller in that mode is four or five independent dimmer channels in one device — cabinet lighting, cove lighting, or a run of separate strips that never needed colour at all. On the Pro it is five DIN-mounted dimming channels in one module.
And cctx2 is not the same as one RGBWW strip. It gives two separate tunable-white zones — two rooms, or two levels of the same room, each with its own warm-to-cold control.
The Pro’s colour temperature range defaults to 2700–6500 K and can be remapped anywhere between 1000 K and 10000 K to match the strip actually fitted.
Using 230 V wall switches
The controllers run on 12/24 V, so an ordinary 230 V switch cannot be wired to an input directly. The Shelly Decoupler bridges the gap — an optocoupler that links the AC and DC circuits optically, with no electrical connection between them.
It comes as a 1-channel or a 4-channel unit, in 230 V and 120 V versions, and draws under 0.6 W. Maximum output is 2.4 mA DC — enough to trigger an input, nowhere near enough to do anything else, which is exactly the point.
- L
- Live in, 230 V AC — from the wall switch
- N
- Neutral in
- O
- DC output — to the controller input (I1–I4 on Plus, SW1–SW5 on Pro)
- Ʇ
- Ground — to the controller's 12/24 V negative terminal
Wire colours: brown is the AC input, blue neutral, red the DC output, black the ground.
The same decoupler also lets a 230 V PIR, microwave or light sensor trigger a DC input, which is how you get presence-controlled strip lighting without changing the sensor.
Settings worth knowing
High frequency mode. Raises the PWM frequency from 833 Hz to 22 kHz, which silences the whine some DC drivers make. The trade-off is stated by the manufacturer: colours become less precise at low brightness in the RGB profiles. Use it where the buzz is audible and the strip is white or used bright; leave it off where low-level colour accuracy matters.
Min/max brightness. Reframes the dimming range onto the part the strip actually uses well. This is the setting that fixes a strip that does nothing for the first 20 % of travel — the same setting, and the same reasoning, as on a mains dimmer. See dimmer settings.
Min brightness on toggle. Default 3 %. Stops the light coming back on at an invisible level after being dimmed to almost nothing.
Button fade rate and transition duration control how fast brightness changes while holding a button, and how smoothly it moves on a scheduled change.
Analog input. Both devices accept a potentiometer as well as a switch or button — 10 kΩ is recommended. A physical dimmer knob, wired straight to the controller.
Tips & best practices
- Buy the non-dimmable driver deliberately. A dimmable one is not harmful here, only wasted money — and it invites the next person to wire it the wrong way.
- Size against the device total, then check the per-channel rating. The total is what trips first.
- Keep the DC run short. Voltage drop over a long low-voltage run shows up as a strip that is dimmer at the far end.
- Match the strip to the driver voltage. A 24 V strip on a 12 V driver lights faintly and looks like a fault.
- Set the profile before you wire. Changing it afterwards means rechecking which output is which — on the Pro, O4 is warm white in one profile and Light 4 in another.
Video tutorial
Device configuration for relays, input modules and RGBW/RGBWW controllers, including how the device profile changes what each output means.
Loads YouTube when you press play. Watch on YouTube
By ShellyGuide on YouTube