- Home
- Getting started
- The web interface
Getting started
The device web interface
Reach a device in the browser — the only way in when something is wrong.
Updated: September 2026
What it does
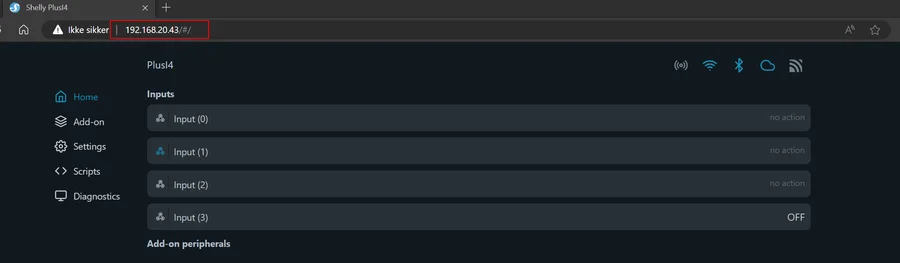
Every Wi-Fi Shelly carries a complete interface, served by the device itself and reachable from any browser. No app, no account, no internet.
From it you can read live status — switch state, power draw, sensor values — and configure everything the device supports: Wi-Fi, cloud, MQTT, static IP, schedules, authentication and firmware. On Gen2 and newer you also manage scripts here.
When to use it
The app is the right choice for daily use. Use the web interface when you are:
- Commissioning a device without an internet connection.
- Setting something the app does not offer — MQTT, scripts, or local pairing of a remote control.
- Diagnosing a problem.
- Adding a device to Home Assistant or Homey without the Shelly app.
The last one is worth knowing: a device can join the network and be handed to a local system without ever being claimed to a Shelly account.
Two ways in
Both work at the same time. A device online over Wi-Fi may still have its access point up for direct access.
Through the device’s own access point
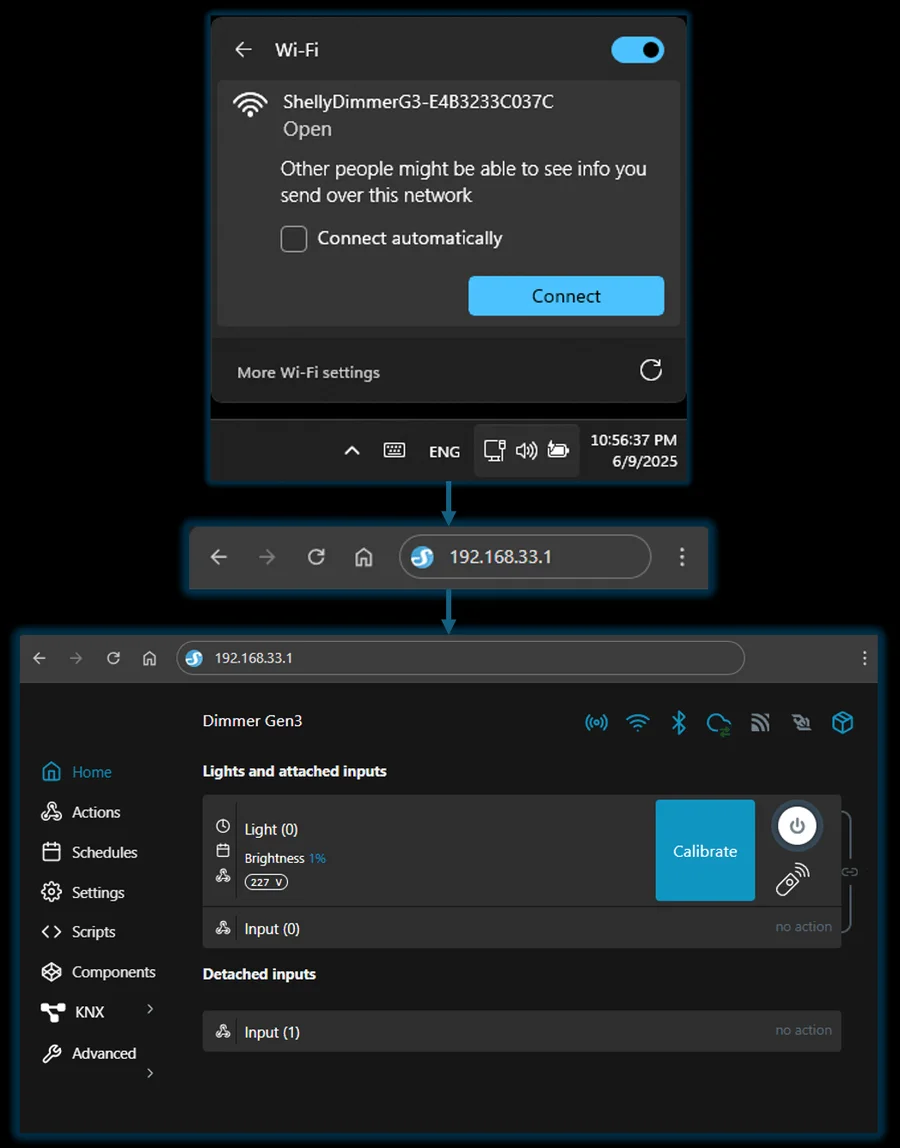
An unconfigured device broadcasts its own network, named after the model and its ID — Shelly1PM-A8032AB12C34 or similar. Join it from a phone or laptop, then type this address into the browser’s address bar — not the search field:
http:Ignore the “no internet” warning. That address is the device itself.
Through the local network
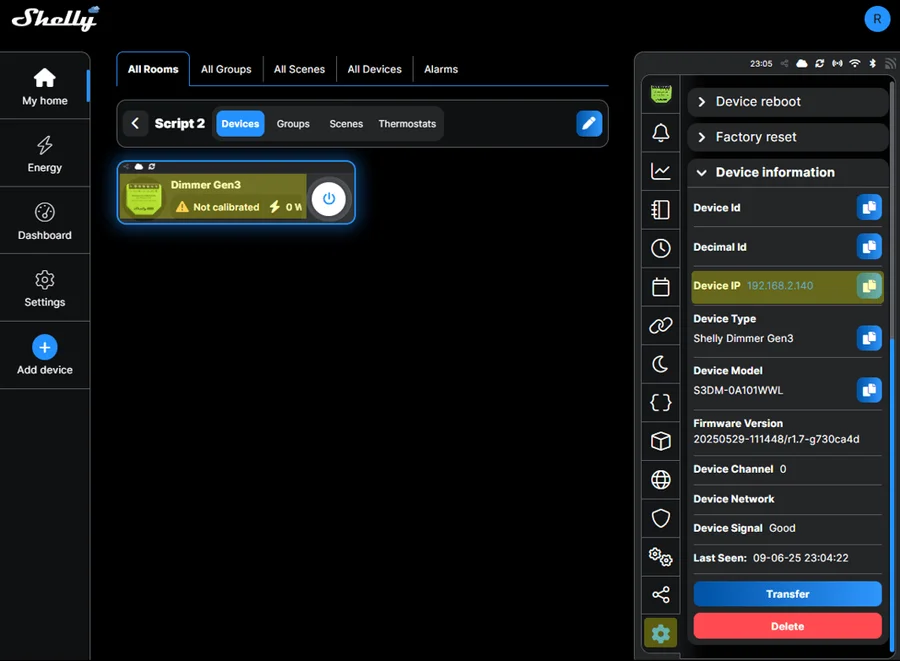
Once the device is on your Wi-Fi, browse to the IP address it was given. Find it in the Shelly app under device information, or in your router’s client list.
The access point closes itself — since firmware 1.7.5
Without an access point password:
- It is open for 15 minutes after the device starts — 3 minutes on battery-powered devices.
- It closes 5 minutes after the device gets onto Wi-Fi.
To open it again: a network reset, five seconds on the reset button, or — if the device never got online — switching the power off and on. Each gives another 15 minutes.
An access point password keeps it open for good, and it cannot be removed once it is set. Set one on any device you will have to come back to.
Tips & best practices
- Set a device password under Settings → Authentication. Without one, anyone on the network can switch the load.
- Update firmware from here before claiming the device. You see the version and the result, which the app does not always show clearly.
- Bookmark the IP of devices you work on often. Reserved addresses make the bookmarks permanent.
- The interface differs between generations. Gen1 calls the network settings Internet & Security; Gen2 and newer call it Network. Same job, different label.
- Do not disable the access point until the device is confirmed on Wi-Fi. It is the way back in when the password was wrong.