- Home
- Getting started
- Reset a device
Getting started
Reset a Shelly device
Pick the right reset for the problem, and know what each one clears.
Updated: September 2026
Which reset do you need
Two different operations get called “reset”, and picking the wrong one costs you the device’s whole configuration.
Network reset clears the Wi-Fi credentials and switches the access point back on for 15 minutes. Schedules, scripts, calibration and the device name all survive. This is what you want when the device has moved house, the router changed, or you typed the password wrong.
Factory reset returns the device to how it left the factory. Everything is gone.
Start with a network reset. It solves most cases, and it is far less work to undo when it turns out the fault was somewhere else.
What a reset clears
| Network reset | Factory reset | |
|---|---|---|
| Wi-Fi credentials | Cleared | Cleared |
| Access point | On for 15 minutes | On for 15 minutes |
| Device name and room | Kept | Cleared |
| Schedules and scenes | Kept | Cleared |
| Scripts | Kept | Cleared |
| Cover or dimmer calibration | Kept | Cleared |
| Device password | Kept | Cleared |
| Firmware version | Kept | Kept |
| Claim to a Shelly account | Kept | Kept |
Without an access point password, that access point is only open for 15 minutes — see the access point closes itself.
On Plus, Gen3 and Gen4, the 5-second button hold is not a network reset. It only opens the access point. See method 1 below.
Neither reset releases the device from a Shelly account. A device that reports “owned by another user” will keep doing so after any number of factory resets — see device owned by another user.
The five methods
The same five work across the range. Which ones are available depends on the device and its settings.
1. The reset button
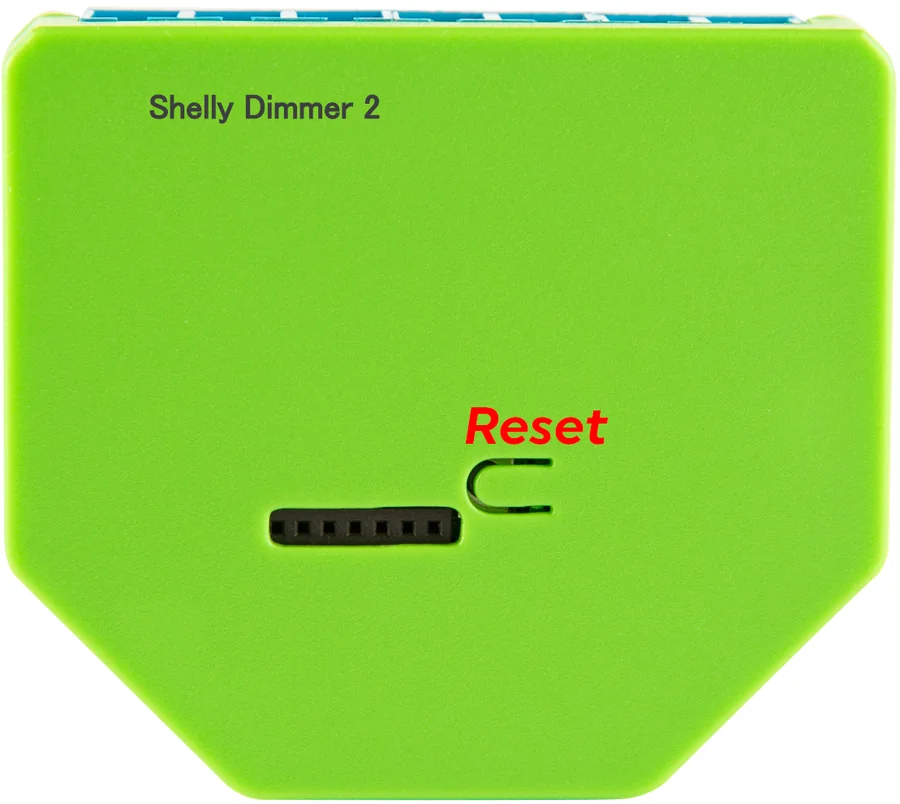
The button is on the device housing, sometimes behind a small hole.
On Gen1 — Dimmer 2, RGBW2, Plug S and their contemporaries:
- Hold 5 seconds — network reset. The Wi-Fi credentials are cleared and the access point comes back on.
- Hold 10 seconds — factory reset.
On Plus, Gen3 and Gen4:
- Hold 5 seconds — the access point and Bluetooth come on, and nothing is cleared. The Wi-Fi credentials survive and the device stays on your network.
- Hold 10 seconds — factory reset.
The 5-second hold is the one that differs between the generations, and it differs in the direction that matters: on Gen1 it clears the network settings, on everything newer it clears nothing.
If the hold seems to do nothing, the access point has probably closed itself again — without a password it stays open for 15 minutes. The device is still on the network, so reach it at its IP address instead.
2. Power cycles — this is a factory reset
Available only if the device has power-cycle reset enabled in its settings.
The supply has to have been switched off and on before the method works at all. A device that has been powered continuously does not respond to it until it has seen one off-and-on of its own.
Then five successive power cycles. One cycle is off and on again, so that is ten flips of the breaker, with about two seconds between each.
This is the method to reach for when the device is already installed and the button is behind a wall plate — and it is worth knowing what it costs, because the button behind that plate would have offered you the choice between the two.
3. The switch input — also a factory reset
Everything goes, exactly as in method 2.
Factory reset from the input is switched on from the factory, on inputs of type switch or button. Check the input’s settings if someone has turned it off.
It has to be done inside the first 60 seconds after the device boots. Not after a minute — within the first one. Power the device up and start straight away; once the window closes, nothing you do at the switch has any effect.
- A momentary button — press it 5 times.
- A wall switch — flip it 10 times: 5 times on and 5 times off.
It works on every generation, Gen1 included. On Plus and newer devices the input must be powered between L and SW — a wiring requirement on those devices, not a limit on which generations have the method.
4. The app
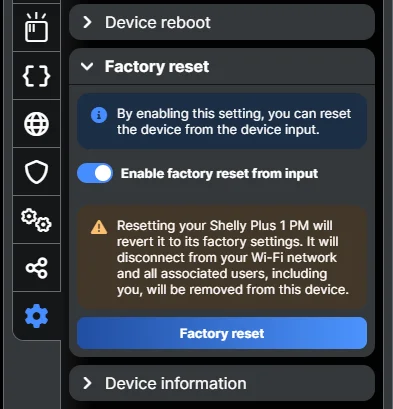
In Shelly Smart Control or at control.shelly.cloud: open the device settings, choose Factory reset, and confirm.
5. The web interface
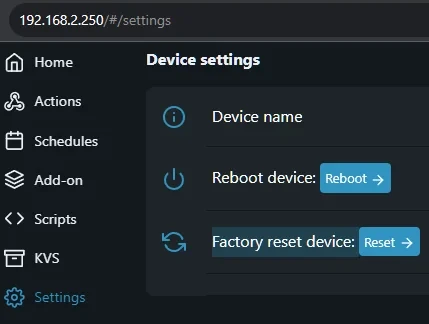
Open the device’s IP address in a browser, go to Settings, and use Reset next to Factory reset device. See the web interface.
Tips & best practices
- Try a network reset first. Losing a dimmer’s calibration or a cover’s end limits to a factory reset you did not need is an hour you will not get back.
- Note the device ID before you reset. It is printed on the housing and it does not change, so it is how you find the device again afterwards.
- A factory reset does not fix a failed firmware update. See update problems.
- Enable power-cycle reset before you close the wall on anything mounted where the button will be unreachable. It is a factory reset when you use it, but that beats having no way in at all.
- Set an access point password on anything you will come back to, while you still have access. It is the only thing that stops the access point closing itself, and it cannot be removed again afterwards.
- Reset before you sell or hand over a device — and release it from your account in the app as well, or the next owner cannot use it.