1. Home
  2. The app
  3. Energy dashboard

The app

Energy dashboard

Set the two things that decide whether the energy dashboard means anything — appliance type and consumption calculation.

Updated September 2026

What measures what

Dedicated meters are not the only devices that measure. Any Shelly with PM or EM in its name meters its own output — 1PM, 2PM, Pro 4PM, Plug S, the RGBW controllers. A house with a dozen PM devices already has per-circuit metering without a single dedicated meter.

A Pro 3EM or an EM answers a different question. It sits at the incoming supply and measures the whole installation, including what is exported to the grid.

Both together is the useful combination — and that is exactly why two settings have to be right on every metering device. Appliance type decides which category a reading lands in. Consumption calculation decides which totals it is added to. Get the second one wrong and the same watt is counted twice.

1
Per device

Set the appliance type

Open the device, tap the two cogwheels icon for application settings, open Appliance Type, pick one and save.

The types are Lighting, Entertainment, Heating and cooling, Refrigeration, Laundry and cleaning, Cooking, Pool and garden, Electric vehicle, Ventilation, Water heater, Roller and Other. Below them sit two sources: Grid source for the meter at the incoming supply, and Generated energy for an inverter feed.

Those two are not cosmetic. They tell the dashboard which readings are supply and which are production, which is what makes import and export display correctly.

Everything defaults to Unknown, and a dashboard where everything is Unknown shows one bar and tells you nothing. Set the type while commissioning — later means opening every device again, and by then nobody remembers which relay feeds the oven.
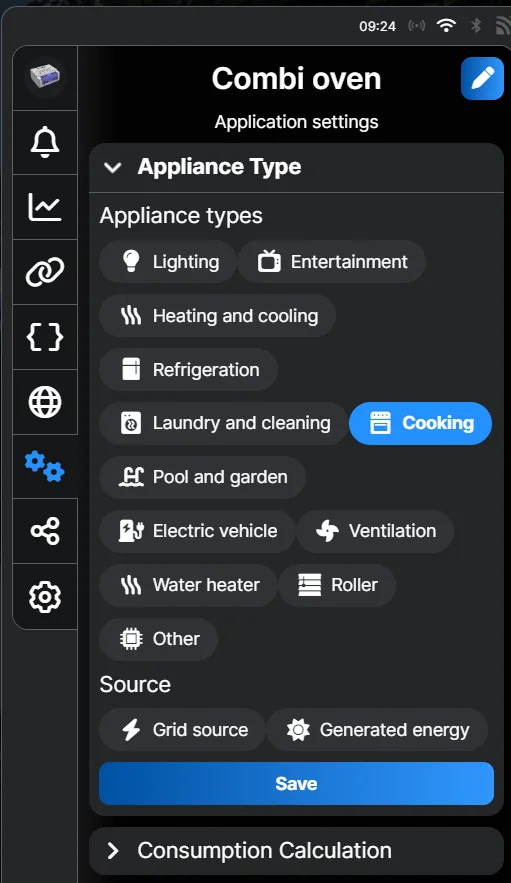
The Appliance Type panel with the twelve types and the two source options
Twelve types, and two sources at the bottom.
2
Per device

Set the total meter to count once

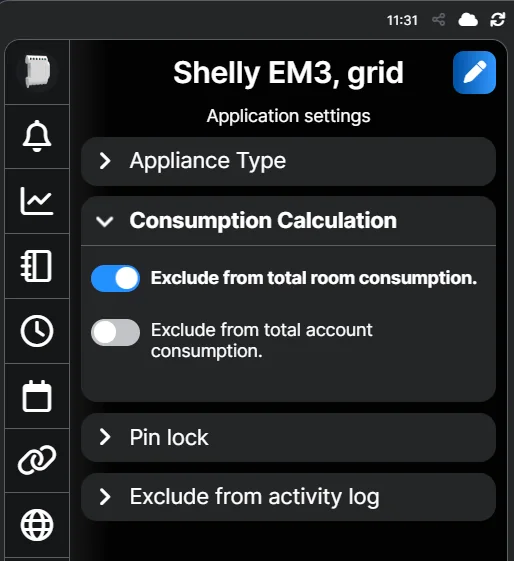
On the same settings page, open Consumption Calculation. For a three-phase meter measuring the whole installation:

  • Exclude from total room consumption: on. The meter reads the whole house. Counted in its room, the electrical panel would appear to consume everything.
  • Exclude from total account consumption: off. This is the number that should be the account total.
Consumption Calculation on a Shelly EM3 with exclude from room on and exclude from account off
The grid meter: out of the room, into the account total.
3
Per device

Set each appliance to count in its room

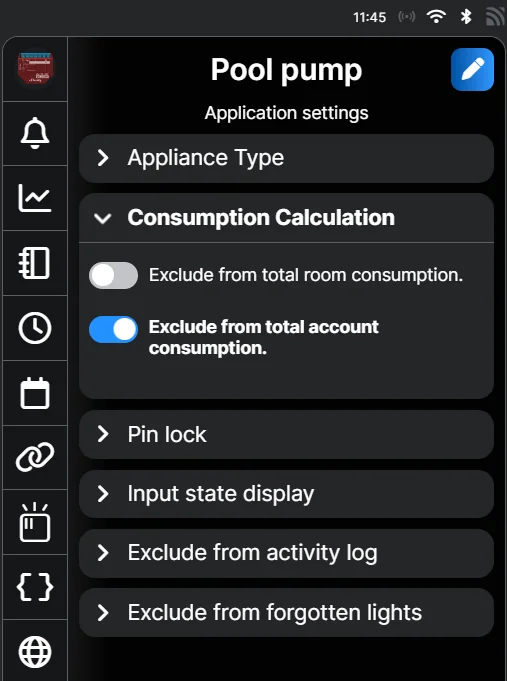
For everything else — the pool pump, the oven, the lighting circuit — the two switches go the other way:

  • Exclude from total room consumption: off. This is what fills in the per-room figures.
  • Exclude from total account consumption: on. The grid meter has already counted this appliance. Adding it again would count the same watt twice.
Consumption Calculation on a pool pump with exclude from room off and exclude from account on
An appliance: into its room, out of the account total.

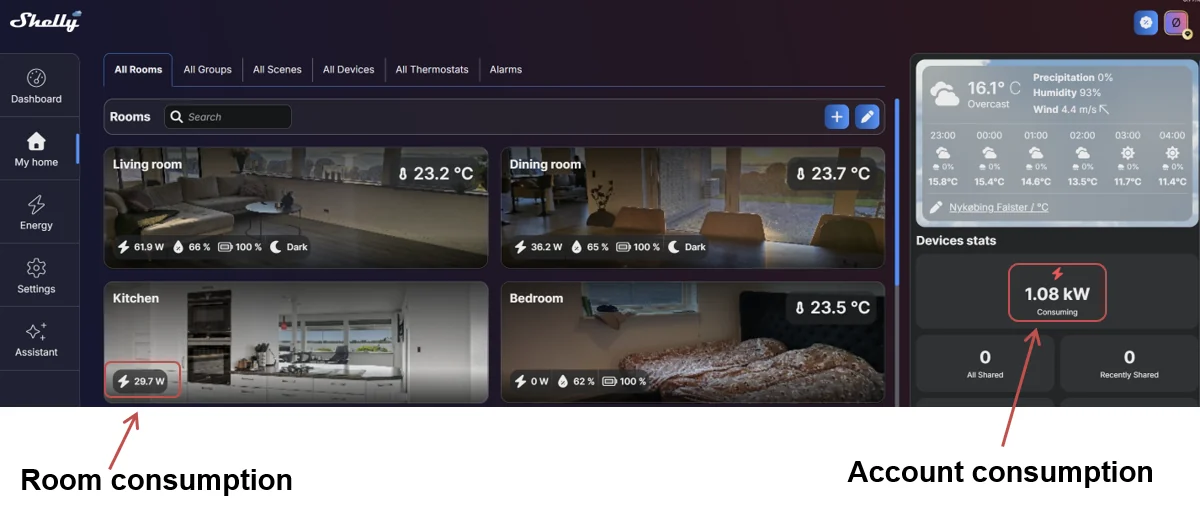
Set this way, each room shows what it actually uses, and the account total stays the reading from the meter at the supply.

The rooms overview with per-room power on each room card, and the account total in the side panel, both marked
Step 2 and step 3 decide these two numbers.
4
Result

Read the dashboard

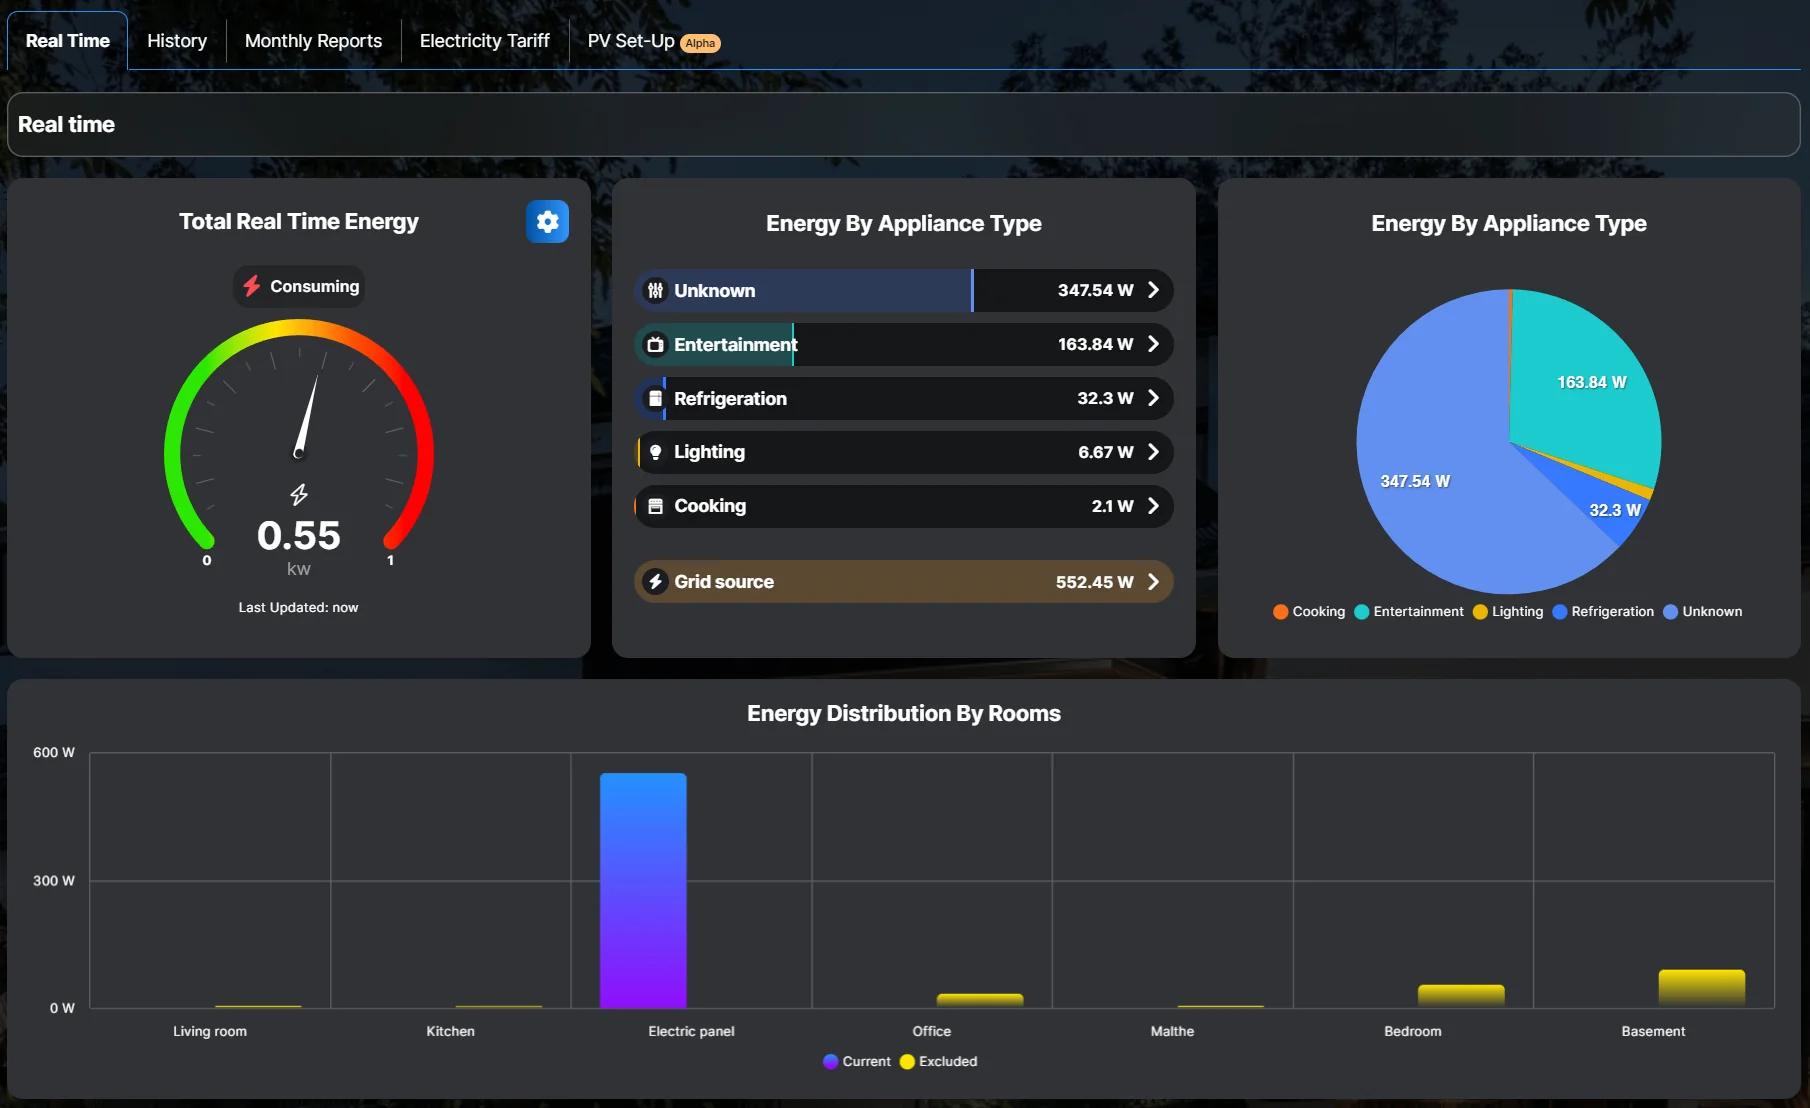
Real Time shows what is happening now: a total gauge in kW, a breakdown by appliance type, and a bar per room. History and Monthly Reports cover a chosen period — the view for what last month cost, and for comparing before and after a change.

The gauge has a maximum you can set. Match it to the installation: a 25 kW scale on a house that peaks at 6 kW makes every reading look like nothing.

In the room chart, the bars are split into current and excluded. That split is step 2 and step 3 made visible — it is how you check the setup was right without adding anything up by hand.

The Real Time tab with a total gauge, a breakdown by appliance type and a bar chart per room
Real Time, with the appliance breakdown and the per-room bars.

Cost and tariffs

Entering a price per kWh turns the dashboard from watts into money, which is the number a customer actually reacts to.

Where a day and night tariff applies, enter both. Consumption moved into the cheap window then shows up as a saving rather than as the same number in a different hour.

For heating and charging that should follow the actual hourly price rather than a fixed one, see live electricity prices.

Tips and best practices

  • Set both settings on commissioning. Appliance type and consumption calculation are two taps per device then, and an evening’s work later.
  • Check the account total against the meter at the supply. If it is higher, something is being counted twice.
  • Check the 3EM’s transformer direction. Reversed clamps make import look like export, and the dashboard will show it confidently.
  • Set the gauge maximum to the installation. A scale four times the real peak hides everything that matters.
  • Measure for a week before promising a saving. A single day is weather, not a pattern.

Video tutorial

Energy data settings and the dashboard, including how the device types feed into it.

Loads YouTube when you press play. Watch on YouTube

By ShellyGuide on YouTube