
Application Guide
Garage door control with Shelly
Open and close your garage door from anywhere with reliable Shelly relays and door sensors.
Last updated: April 2026
Introduction
A Shelly relay turns almost any existing garage door opener into a remotely controllable door. By wiring the relay in parallel with the existing wall button and triggering a short pulse, you can open or close the door from the Shelly Smart Control app, a schedule, or an automation — without modifying the motor itself.
This guide covers the recommended hardware, wiring principle, the critical Auto-Off Timer setting, and how to add an optional door sensor for real open/closed status in the app.
Quick start — find your scenario
Compatibility table
Pick the relay and sensor combination that matches the level of feedback you want in the app.
| Component | Recommended device | Power supply | Function | Notes |
|---|---|---|---|---|
| Relay (recommended) | Shelly 1 Gen4 | 12 V DC, 24–48 V DC, or 110–240 V AC | Triggers garage door opener | Supports Shelly Plus Add-On for sensor input |
| Wired sensor | Shelly Plus Add-On + reed switch | Powered by Shelly 1 | Detects open/closed | Enables “Garage Door” mode in the app |
| Wireless sensor | Shelly BLU Door/Window | Battery (CR2032) | Detects open/closed via Bluetooth | No extra wiring; status only (no Garage Door mode) |
| Alternative relays | Shelly Plus Uni, Shelly 1 Mini Gen4, Shelly Pro 1 | Various | Trigger only | No support for Plus Add-On with reed switch |
Installation
Six steps from device choice to verified operation. Follow them in order — Step 4 (Auto-Off Timer) is the one that most installations get wrong.
Choose your relay
When to use this approach: we recommend the Shelly 1 Gen4 for garage door control because it supports the Shelly Plus Add-On, which lets you connect a reed switch to monitor open/closed status. The Shelly Plus Uni, Shelly 1 Mini Gen4, and Shelly Pro 1 work as alternatives if status monitoring isn’t needed.
The Shelly 1 Gen4 supports:
- 12 V DC
- 24–48 V DC
- 110–240 V AC
This makes it compatible with virtually all garage door opener systems.
Wire the relay
Wire the Shelly 1 Gen4 according to the diagram. The example shows 230 V AC supply, but the principle is identical for 12 V or 24 V DC — only the supply terminals change.
The relay’s potential-free output (terminals O and I) connects in parallel with the existing wall button on the garage door opener. This means the wall button and Shelly both work — neither replaces the other.
- L
- Line in (or 12/24–48 V DC +)
- N
- Neutral (or DC return)
- O
- Potential-free output — to opener trigger
- I
- Potential-free common — to opener trigger

Add a sensor (optional but recommended)
You can use the Shelly 1 Gen4 without a sensor, but adding a door/window sensor lets the app show the actual open/closed status of the door — much more useful than just “I clicked the button”.
Two options:
Wired (recommended): Shelly Plus Add-On + reed switch
- Connect a magnetic reed switch to the Shelly Plus Add-On
- The Add-On plugs into the Shelly 1 Gen4
- Mount the reed switch on the door frame, magnet on the door itself
- Configurable as “Garage Door” type in the app, showing the proper icon
Wireless: Shelly BLU Door/Window
- Battery-powered (CR2032), no wiring required
- Connects via Bluetooth to a Shelly gateway device
- Shows open/closed status, but cannot be linked to the Shelly 1 as a “Garage Door Controller” (no garage door icon in the app)
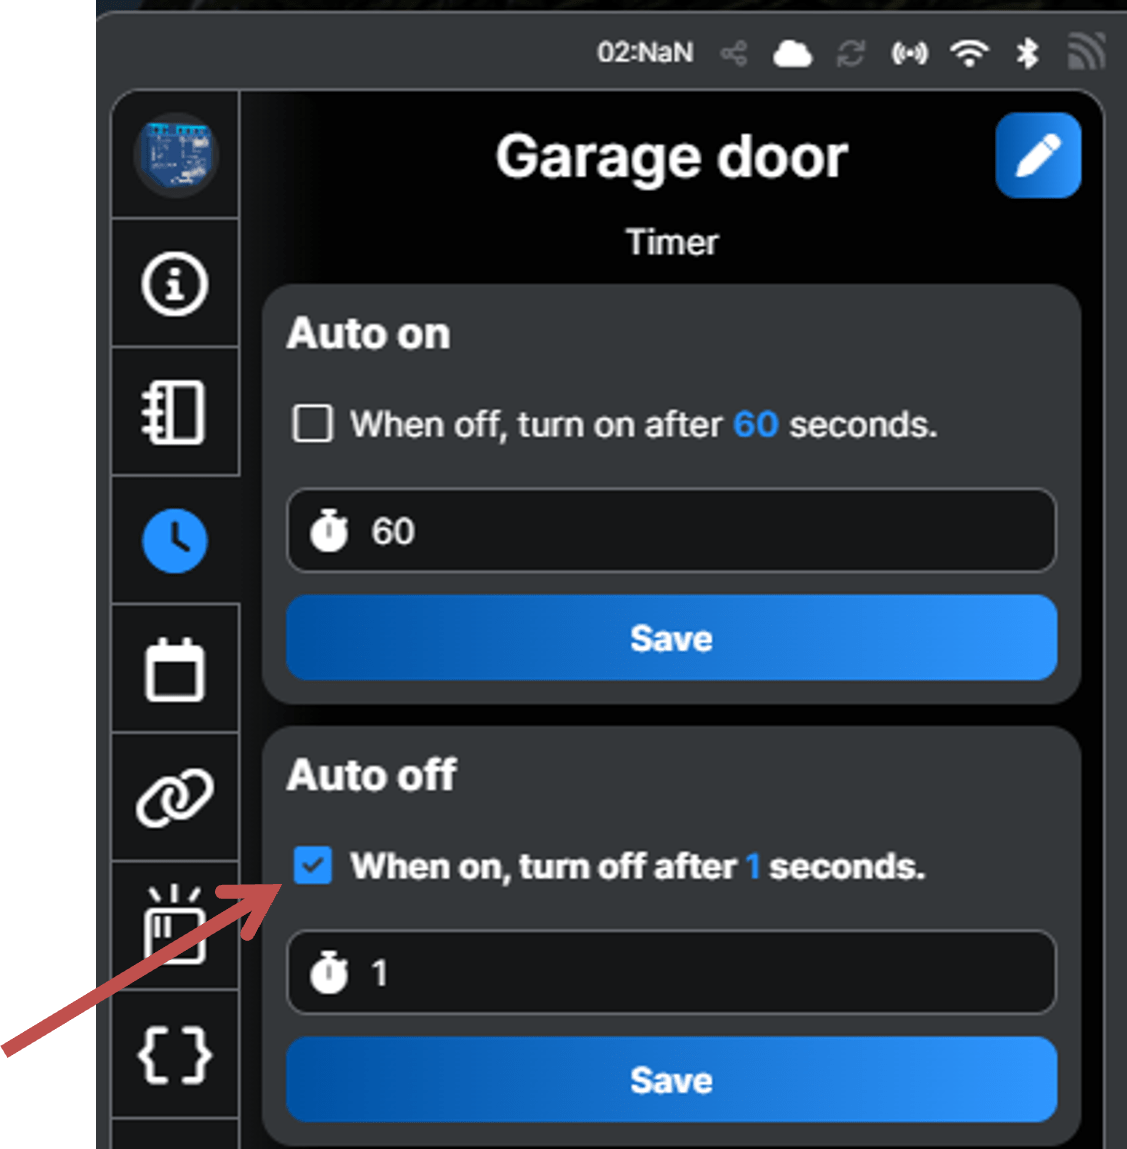
Set the Auto-Off Timer (critical)
Garage door openers expect a momentary pulse (like pressing a wall button). Without an Auto-Off Timer, the relay stays closed and the opener will not work correctly — and you risk damaging the motor.
Configure as follows:
- Open your Shelly 1 Gen4 in the Shelly Smart Control app
- Go to Timer settings
- Enable Auto-Off
- Set duration to 1 second
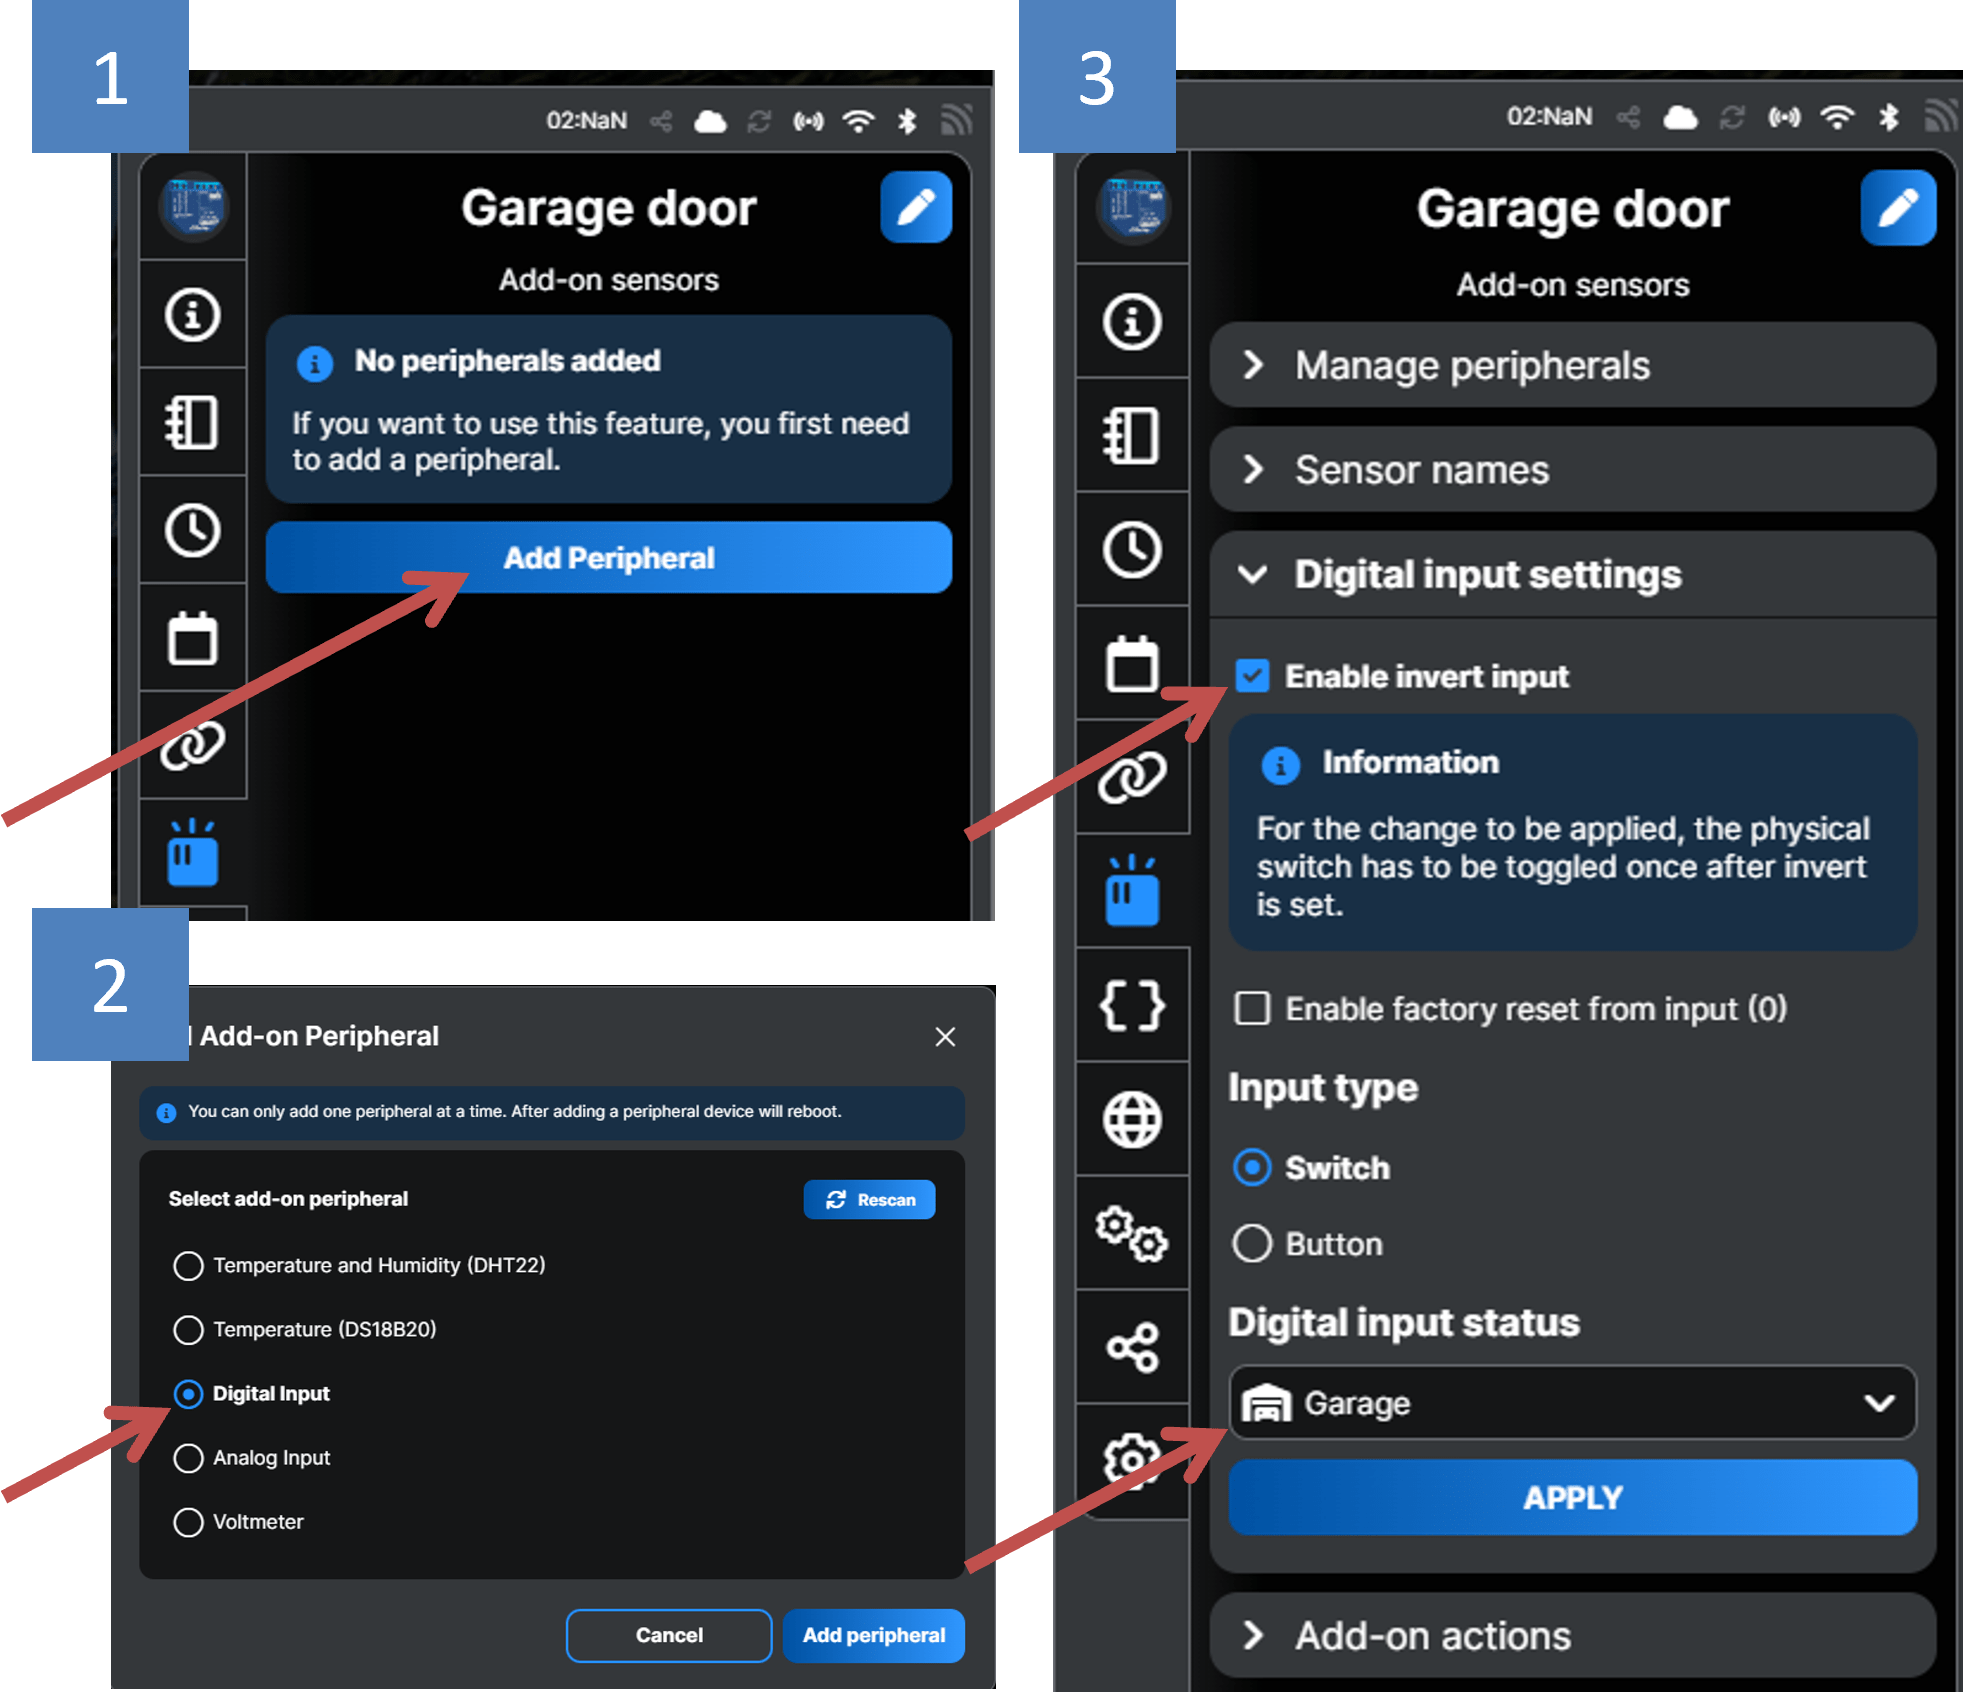
Configure the sensor in the app
If you have added the Shelly Plus Add-On with a reed switch, configure it as a Garage Door sensor:
- Open Shelly 1 Gen4 in the app
- Tap Add peripheral → select Digital input
- After the device reboots, open Peripheral settings
- Enable Invert input
- Set Digital input type to Garage
Test and verify
Test from the app:
- Tap the garage door icon → relay should pulse for 1 second
- The opener should activate (door opens or closes)
- The sensor should reflect the actual door state in the app
Video tutorial
A step-by-step video walkthrough is coming soon.
By ShellyGuide on YouTube
Tips & best practices
- Always wire in parallel with the existing wall button — never interrupt the motor’s main supply.
- If the door doesn’t react, verify the Auto-Off Timer is set to 1 second and that you wired to the potential-free output (O/I), not the line output.
- If the sensor shows the wrong status (open/closed reversed): toggle the “Invert input” setting in the app.
- Use schedules for door-left-open warnings. Trigger a notification when the door has been open for more than 10 minutes.
- Combine with Shelly BLU Motion in the garage to automate lights when you arrive.
- Share access without sharing accounts. Use the Shelly Smart Control app’s user permissions to give family members access to the door only.